Showing posts with label Garden. Show all posts

Sunday, 23 November 2014

Garden Gate Part 17 - Completion

This is the final part of the build. The gate is done.

Fitting the hardware was easy as drilling pilot holes for the stainless steel fasteners was easy enough to do. This is oak and as you may know it eats mild steel for breakfast. You find that mild steel leaves black marks on oak over a period of time outside with the tannins in the oak reacting with the iron in the steel. Stainless steel on the other hand has no such issues.
The hinges were first to be fitted, the hinge brackets were then positioned with enough clearance on one of them to enable expansion/contraction of the wood and metal.

I use a Vix bit to centre drill each of the the hinge fastening holes.

VIx bit used to centre drill the holes
in the hinge bracket

Tuesday, 18 November 2014

Garden Gate Part 16 - The Hinge Post and Striker Post construction

I didn't have enough stock to make the hinge post from one piece so ended up glueing 3 pieces together to get the required rough dimensions.
Then the whole assembly was laminated together.

After the epoxy had cured the post was cut to length and the rainwater run-off angle cut on the top.
My 10" table saw is not quite big enough to be able to take a cut this deep so I broke out the cross cut tenon saw.

Wednesday, 5 November 2014

Garden Gate Part 15 - The Hinge Post design

Ordinarily I would not even consider documenting a piece of wood bolted onto a brick pillar. But as this project has become somewhat of an epic I think it needs recording.

I wanted the post to follow the same lines as the gate but have the following criteria:

  • Made from same species
  • Capable of mounting the hinges
  • Capable of being bolted to the brick pillar
  • Should follow the same lines as the gate
  • Have rainwater run off
  • Be finished with the same varnish.


So out came Sketchup again and I drew the post. I also drew in the hinges that I am using with corresponding mounting holes. These are 2 feet long. The top mounting bracket will be mounted upside down to prevent the gate being lifted from its hinges. There is also a self return spring to close the gate. This too had to be modelled in Sketchup. All those models are now available in the Sketchup 3D warehouse as I've uploaded them for other people to use in their projects.

The physical spring is made from stainless steel and the hinges are made from mild steel that has been heavily galvanized. The intention is to fix all the hardware with appropriate stainless steel fasteners to avoid rot and blackening of the oak.

Hinge post detail.
I have opted for 5 - 10mm  (3/8") diameter shield
bolts to secure the post to the brickwork.
All the load is transferred to the lower hinge bracket.

I was running out of white oak but had sufficient left to make both the hinge post and striker post. However I needed to do some judicious laminating to gain enough stock.
After the epoxy had cured I milled the post to dimension and glued a face board on what will be the front (as viewed from the road). The overhang of the facing board is not strictly necessary as it doesn;t do anything apart from hide the gap between gate and post. But it looks attractive especially with the top detail seen here in the Sketchup representation.

Top of hinge post detail.
The decorative brickwork at the top needs
chasing out slightly. This will be done on
site when the gate is about to be mounted.


Tuesday, 28 October 2014

Garden Gate Project - Part 14 - More finishing and gilding

Finishing can be really boring. The gate requires 7 coats of varnish all over and the application of which is very time consuming. Each coat needs 24 hours between drying and every other coat needs rubbing with 320 grit. Also the dilution of each coat gets less between coats until you end up with the varnish going on neat from the can.
I hadn't worked out a way of coating each side at the same time and the gate is too heavy to place onto painters pyramids or a simple bed of nails. So consequently 7 separate coats ends up taking 14 days to achieve. No pictures of paint drying I'm afraid.

In the meantime we have had guests over from foreign climes and we have been hosting for them. I did manage to get a little shop time last Sunday whilst they went to a Manchester United football game against Chelsea. I have absolutely no interest at all in football so had a few hours in the shop.

I decided to highlight the letters of the sign with black paint and gild the numbers with gold leaf.
The signs all had a base coat of shellac followed by a thin coat of spar varnish. When that had thoroughly dried I started to apply so black enamel paint. Unfortunately this paint was water based and would not take to the now varnished over letters! DOH!. Luckily I had some oil based exterior black gloss paint so carefully applied that paint instead.

Dunluce is the name of our house

Monday, 20 October 2014

Garden Gate Project - Part 13 - Finishing

All surfaces sanded to 180 grit, my makers mark branded on and then the first coat of Epithanes spar varnish. This is thinned to 50% using either mineral spirits (known as white spirit in the UK - this is not odourless in the UK) or Epithanes thinner. I used the latter as it is odourless and is the same price as white spirit.

Just another 6 coats to go! Gradually reducing the amount of thinners to get to full strength eventually.

Sanding complete

Not bad amber tint for first coat
It will get deeper with more coats


Tuesday, 14 October 2014

Garden Gate Project - Part 12 - Glue up #2

I like the smell of epoxy in the morning.


After the glue had cured the pieces of wood that were protruding from the mortises were cut off.
Then using a combination of flush trim saw, various block panes and that DIY tool that never gets used in fine woodworking, the Black and Decker belt sander (!), the joints were all sanded flush. It really is the right tool for the job and I bought it many years ago to sand a table with it ending up on the shelf ever since. I have a new found fondness for a power tool.

Using a Japanese ryoba saw to saw off excess

Friday, 10 October 2014

Garden Gate Project - Part 11 - Glue up

The glue up is a multi stage procedure:

  • Top rail, mid rail and mullions sub assembly
  • Lower rail, stiles to the previous sub assembly making the carcase assembly
  • Vertical boards to gate carcase assembly
  • Diagonal supports.
The reason for approaching the glue up in this way is to stop panic when the glue is drying.
The mullions were generously coated with epoxy glue as were their corresponding mortises in the top and mid rails. They were inserted and the side stiles were attached without glue and everything squared up and clamped.


After leaving overnight to cure the stiles were removed and the first sub-assembly was complete.


The next evening and there was a little squeeze out to clean up. As a bench chisel will not now fit in I used a chisel plane.
Chisel plane - you never know when you'll need one.

Paring the glue with a bench chisel.

Then the panic sets in when you have to coat tenons with glue and poke glue into the mortise's. All the time you are aware of the glue setting up but with West Systems Epoxy you still have plenty of working time.
After all the tenons were inserted, the clamps added, the piece checked for squareness then the wedges are coated with glue and inserted. Insert them both in both tapping with a hammer.
In the meantime glue is dripping out from all orifices - don't worry about it you can clean it up tomorrow (or leave it in globular form on the floor!)
The important thing is that all the joints are fully coated adding to its longtime water resistance.

Clamps on and wedges inserted.
Wedges in

The next job after curing will be cutting off any excess and cleaning up the excessive squeeze-out. Then the boards and diagonal supports can be cut to length and glued in.


Thursday, 9 October 2014

Garden Gate Part 10 - More signs and preparation

As there were many more letters to be carved I decided to have a look at the Milescraft Signpro. Essentially this is a routing template comprising letters, numbers and some punctuation marks.
The set I have is the 1212 which has a full range of 2.1/2" high and 1.1/2" high characters. It also has 2 different diameter long series router cutters, various low profile clamps, universal router base and various accessories to enable the user to make long signs.

In use the template couldn't have been simpler to use but after routing some letters still needed some work with a chisel to clean up. Also some light sanding cleaning up the routed characters was needed.
The finished results were acceptable and saved a lot of time. I know I could have done it using Norm's manual method as mentioned in a previous post but I'm all for time saving measures.

I then had to route pockets in the oak cross rails to inset the signs into. The reason for this is the stock I used to make the signs was 3/4" thick and I only wanted the signs to protrude around  5/16" or so.

Cleaning up the end of the pocket
in the mid rail

Tuesday, 30 September 2014

Garden Gate Project - Part 9 - Carving letters and numerals

There is a New Yankee Workshop episode (Season 17 episode 12) where Norm Abram showed how to make carved wooden signs.


This was a really interesting show where Norm was showing how to cut letters and numerals in several ways:

  • By hand using carving tools
  • By CNC machine
  • By hand using a router.

Wednesday, 10 September 2014

Garden Gate Project - Part 8 - Shaping the stiles

As the top of the stiles had been left cut longer it was a simple job to mark out and cut the tops.
I was going to make a template to do this but found an ideal one in my drafting equipment. It is an acrylic protractor. It is the exact size I wanted.

First of all I marked out some base lines 40mm (just over 1.1/2") up from the top of the upper mortise. Then I marked out another line 60mm (just under 2.3/8") further on from this line. Then I simply joined the dots. I projected this around to the other face and marked that too. This is just as a visual reminder when cutting. You don't want to cut the wrong piece out at this stage!

A protractor used to mark out the curve

Tuesday, 9 September 2014

Garden Gate Project - Part 7 - Tongue and Groove boards

The tongue and groove boards were made next. To do this some 6/4 oak was roughly cut to width. Then each of these boards had one face cleaned up and an adjacent face jointed at the jointer. Then, using a wider blade on the bandsaw, each board was carefully resawn. This produced two boards of roughly 18mm thick (just under 3/4"). Then each board was run through the thickness planer to finish at a hair over 15mm (just less than 5/8") thick.
Resawing some 6/4 oak


Thursday, 4 September 2014

Garden Gate Project - Part 6 - cross bracing

Cross bracing for the lower section of the gate is essentially to aid long time stability. The bracing needs to be less than 45 degrees to each stile otherwise the braces are not actually doing anything. The timbers were milled and cut to length. I chose an angle of 40 degrees and marked out each cut. Then using the tablesaw and mitre gauge the cuts were done.
Mitre gauge is set at 40 degrees

The braces are left long at the moment.

As this exposes a lot of endgrain, engrain glue joints not being very strong, each end will have a #20 biscuit slot cut into them. A corresponding set of biscuit slots will be cut into the top of the bottom rail and the underside of the mid rail. Then the lower rail could have its top face bevelled to aid rain water run-off. A straight portion was left at each position where the bevel mates to the lower rail.

After initial glue up the braces will be trimmed to their final length and glued into place with the biscuits.


Tuesday, 2 September 2014

Garden Gate Project - Part 5 - Mullions, lower rail and dry fit

The mortises for the mullions were cut in a previous process so fitting the mullions was a simple process. First of all the stock was milled to a hair over 18mm (around 3/4")  thick and one face jointed. Each component was cut to length and then cut to final width.
Fitting the mullions was just using the smoothing plane on all faces which removed all milling marks and produced a sliding fit.
A pile of mullions

Thursday, 28 August 2014

Garden Gate Project - Part 4 - Top rail profiling

Template making and bandsawing

We had decided that the top rail would be curved long ago during the projects inception. Originally we had planned for the top side and undersides to be curved but this may have proved to difficult to pull off especially since a lot of the oak had voids in it. We didn't want to chance cutting into voids so the underside of the rail remains straight.
However the top of the rail is going to be curved. A template was duly made. This was done by drawing a grid over the top of the rail at 25mm spacing (approx 1"). The half image was exported out of Sketchup as a PDF file to full size.
Gate top curve template
This produced around 3 pages that were pasted to a scrap of 1/4" plywood using some 3M spraymount. The grid was used simply to join the paper sheets together at the correct spacing

Wednesday, 27 August 2014

Garden Gate Project - Part 3 - Top and middle rail with tenons and mortises

More mortises

The top and mid rails required mortises to house the mullions. As the the top and mid rails had already been jointed it was a simple matter of defining a mid point on each and then marking out for each of the mortises.
I normally use a striking knife and undercut with a chisel on my joinery to produce crisp, clean results. The knife line also makes it easy to rest a chisel bevel into.
The pattern bit we have that is 1/2" diameter was measured. The cutter length was 25mm (1") and the bearing thickness was 6mm (1/4"). This dictated the depth that I needed to go to use my method of cutting a shallow clean mortise and cleaning to depth with a router.
Mullion mortises complete

Wednesday, 20 August 2014

Garden Gate Project - Part 2 - Stiles and thru-mortises

The timber (American white oak) was jointed and thicknessed to 70mm thick x 100mmm wide x 980 long (2.3/4" x 4" x  38.1/2").
I had to do some remedial repairs to one of the stiles as when I cut it to 100mm strong I found a flaw. It was inside the wood and wasn't apparent from the outside.
Maybe the timber had been either dried too quickly or taken from too close to the core of the tree (the annular rings on that piece look around 14" diameter)? or both. So I thought I would just rip some more off with the table saw a little at a time (1/8" bites). 5/8" off the width and a pile of sawdust later I managed to get to "almost" good stock again. I glued one of the 2" wide x 3" thick pieces that I took off one of the other pieces back on with some epoxy. After it had setup overnight I cut the piece back to width again.
I also thicknessed and jointed the top rail and middle rail but still had them long.

Next I set to work marking out the mortises. Then using a chain drilling technique I drilled the through holes at the drill press.
Chain drilling is drilling a series of holes close
together and then removing
waste between the holes and therefore
creating a pocket.

Tuesday, 12 August 2014

Garden Gate Project - Part 1 - Design and timber selection

Not strictly fine furniture, a shop project or a musical instrument but essential all the same.
My next project is an oak garden gate and has been commissioned by my wife Elly to showcase TMc Woodworks to people who come to our front door.
I have looked around and didn't find any plans that suited so I designed the gate myself.

Street view

Friday, 16 May 2014

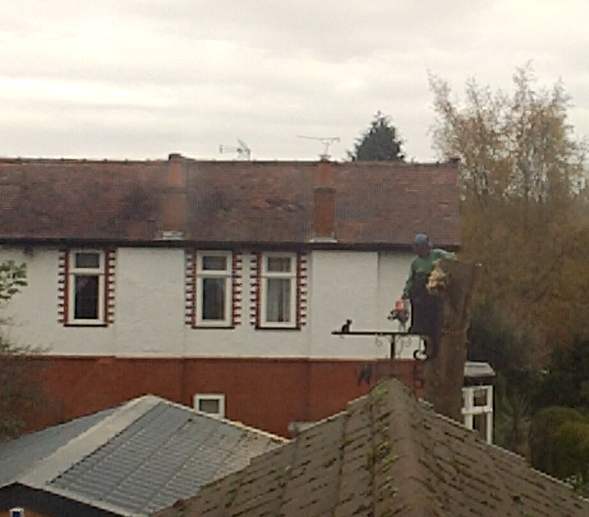
Removing an urban tree

My shop had my neighbours 80 year old ash tree towering over it less than 4 feet away. The tree was around 50 feet high and most of it leant over my side of the wall. Birds roosted in the tree and crapped on my car and driveway. The shop floor is a cast concrete slab and is one of the only remaining parts of the original garage. It is around 12" thick (not sure why so thick) but the previous owner of the house used to keep Ferraris in the garage. Anyway I digress and when I had the shop rebuilt I noticed one or two minor cracks. I also had an inspection pit filled in as that had evidence of tree root damage. Not good when you are under a car getting your eyes poked out by a tree root. The pit had to go and did.

I noticed that the driveway was being uplifted and it was coming from the tree. I notified my neighbour and he was kind enough to apply for planning permission to get approval to remove the tree. The local council came to have a look and the conclusion from them was that the tree was causing "nuisance" which is a legal term. Approval was granted and a tree surgeon was called November 23 and 24 of 2013.

The tree shown near to the shop (Nov 2012)
before the new fancy doors were fitted

The guys got kitted up with climbing gear and set about first of all removing the upper limbs. Then gradually working their way down taking slices across the trunk and dropping the chunks into a skip (dumpster) at it's base.
Climbing up the tree and
removing limbs
The shop is the building with the greeny/blue roof
It took them the best part of two days to remove the tree due to the laborious process involved. There just was very little space for them to drop it by conventional felling. They even came around to my house and cleaned the sawdust from the roof of the shop and pathway. They got seven wheel barrow loads of sawdust from the roof alone.
Next day slicing 3" thick chunks off
the trunk

When the surgeon had finished he said the tree had quite an amount of rot at the base so could have fallen anyway. Only a couple of months earlier the same neighbour had an adjacent tree blow over and block the road.

So now the tree is gone. I didn't manage to get any boards from it, the car can park on the drive without a mass of bird crap coating it and there are no more seeds populating ash weeds everywhere in the garden.

Sunday, 30 June 2013

Garden Planters Build Part 2

I almost forgot to do my completion article on the planters but here it is.
The planters frames were completed and then given three coats of general Finishes Exterior 450. I sealed the end grain of the legs with 2 part epoxy using West Systems Epoxy.
Small planter without cladding

Large planter without cladding


Like any furniture job clamps and a workbench
are essential


Then I started to clad the outside with western
red cedar tongue and groove boards. I fastened them
on with stainless steel 18G nails.


The final part of the construction was the mitred face frame around the top perimeter fixed with some stainless steel screws. I then cut some pond liner material to size and pushed it into the each box. I made slits in the bottom so excess water could drain out and then filled with compost. Once it was around 3/4 full I fitted some more red cedar cleats to hold the pond line in place and then trimmed off the excess. The boxes have considerable weight in them now so I was glad I had moved them into position before doing the last jobs.

Then all that remained was to plant up the boxes, install the self watering system and enjoy them. I hope you like them.

Happy woodworking

Terry

Face frame fitted and a few plants installed

3 of the boxes in situ.
The other box is somewhere else in the yard.


Tuesday, 30 April 2013

Garden Planters Build Part 1

Garden Planters Part One

I have mass produced a whole load of parts using the dedicated mortiser and the router table for the framework of the planters. The material used was 44 x 44 (1 3/4" square  pre-milled meranti from a local wood supplier. I felt it was cheaper for them to supply the ready milled stock rather than me do it myself as there was quite a lot to do and not a lot of time to do it in.


Routing the legs showing the starting stop block
The mortises are 25 deep x 30 long (1" x 1.1/4") by 3/8" wide (the mortise bit is imperial!).

The plywood I'm using for the sides is a good quality external hardwood ply 1/2" nominal thickness which actually measures 11.35 mm.
I cut the slots using an 11mm routing bit that I have.


Routing the legs showing the stopping stop block
I also had to break out my excellent Record 778 rabbeting plane (rebate plane for us English people but I prefer rabbet) and took off a thin shaving all around the edges of the ply so they would drop in OK  I would have used the router but it was late last night and I didn't want to disturb the neighbours.

Record 778 rabbet plane forced into service
I have to say that this plane is superb and very easy/quick to use. Just keep the blade well honed and it will give many years of sterling use.


Dry fitting the parts
Then it just came to dry fitting everything. There are two cube boxes like this one and two larger rectangular boxes. I have ordered some tongue and groove Western Red Cedar to clad the boxes but the carcasses will be finished with some waterproof General Finishes Exterior 450 prior to the cedar being screwed on with stainless screws (no ring nails on this project as I don't want to risk splitting the sapele).

The base panels are to be made from 4" x 1" pressure treated softwood nailed in place with some stainless brads (yes I managed to get hold of a bunch of them :) )

-->