Showing posts with label Tools. Show all posts

Tuesday, 20 February 2018

Dewalt DW738 - replacing the drive wheel and upper wheel

Unfortunately the rubber tyres on this bandsaw are not capable of being replaced and the wear on the upper wheel after nearly 10 years is considerable. Spare parts are still available (2018) for this machine so I decided to buy a new set of wheels to prolong the life of the bandsaw.

The wheels come as a full assembly complete with bearings, new rubber tyres and are a simply bolt off bolt on arrangement. I also bought a new set of rubbing bearings as the old ones had considerable wear.

The procedure to do this is:

  • Open the access door
  • vacuum any residue from previous operations.
  • Remove the table
  • Remove the blade after loosening the upper wheel tensioner


I also removed the upper rack and pinion assembly complete with bearing assembly. While I was at it I removed the lower bearing assembly.

Slacken the motor

Monday, 12 February 2018

Dewalt DW738 Bandsaw Review

I've had this bandsaw now for nearly 10 years and thought it's about time to review it.
Essentially this is a 13" bandsaw (nominally 12") and has a resaw capacity of 155 mm or 6".
The version I have is a 2 speed saw with the speed changed by moving the drive belt onto different pulleys. When supplied from the factory it is in low speed mode and I didn't move that setting until early on in 2014. Then it was found that it ran much too fast for the type of work I use it for. So I moved it back to the slow speed. It is more trouble than it is worth to change it.
Assembled Dewalt DW738 Bandsaw

There is another saw with a continuously adjustable speed setting and it is designated the DW739. That saw is not reviewed here but probably is similar in specification and operation.

Unlike a lot of good Dewalt equipment it should be a different colour. Like Bosch DIY green against Pro blue. Dewalt DIY stuff needs to be brown instead of corporate professional yellow. It is definitely hobby DIY level but has served me well for the last 10 years.

Tuesday, 23 May 2017

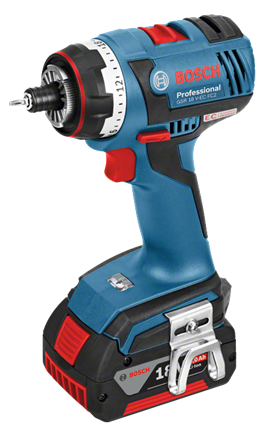
Bosch GSR18V-EC FC2 FlexiClick Drill and 18v 4.0 AH Wireless Battery Review

An essential tool for use in the shop is some sort of drilling device. In the old days a brace or  "egg beater" drill would suffice. Nowadays they have been supplanted by cordless drills. I needed an extra cordless drill for the shop as sometimes you need a few drills setup to do different tasks (drilling, countersinking, screwdriving) so I thought I would have a look at the Bosch range.

I already have several Bosch Blue Professional tools and seem to have bought into the LBoxx systainer storage system. If you are into Festool or Dewalt of course you may have gone down their respective storage routes.

The Bosch Professional 18 volt family is wide ranging, Drywall screwdrivers, impact (percushion) tools, hand held circular saws, jigsaws, impact drivers/wrenches, combination tools and of course handheld drills.

The Bosch GSR18V-EC is part of the Bosch Professional 18V family and has a powerful EC brushless motor. It also has the "FlexiClick" system enabling it to take a range of interchangeable tool holders.

In its basic form it comprises a hex tool holder 


It also comes with a 13mm (1/2") Auto-Lock chuck. No tools are needed for the latter like most drill chucks these days.

The brushless motor gives a long life and low battery drain. The drill was supplied in an L-Boxx 136 with internal moulded dividers.


The drill has the usual controls

  • 2 speed Gear control Low/High
  • Direction rotation clockwise/anti-clockwise (counter-clockwise US)
  • 18 position torque setting
  • Battery charge condition
  • Bright LED illumination

So nothing new there as most drills today have those features.

Other features

  • Tool belt clip. The manual says this can also be used to hang the tool from a ladder - although I haven't yet tried that feature out!
  • Replaceable colour clips for easy labelling and identification of the tool - I don't think I will use that feature as I currently only have one of these!
  • Mountable bit holder for easy transport and storage of bits on the tool - useful I think.
  • Electronic Motor Protection (EMP) protects the motor against overload - a good feature.
  • Bosch Electronic Cell Protection (ECP) which protects the battery against overload, overheating and deep discharge - a great feature. 
  • Kickback control. When drilling large diameter holes wen you emerge on the other side of might hit an embedded nail this will prevent the drill from snatching from your hands and kicking back. I think this is a great safety feature that I've not seen on other cordless drills.
  • Very compact head length (173mm or 6-7/8" long) but still retains high power - it is surprising how short the tool actually can be with immense power reserves.

Battery packs

There is a large range of Lithium Ion batteries are available, wired and wireless so you can choose the best one for your needs.
There wasn't a battery supplied in this kit and there is a wide range to suit all tastes.

I decided to buy the wireless charger and the new 4.0AH CoolPack wireless battery. This is promoted by Bosch as being the "Worlds first wireless charging battery". I think they left out "system on a power tool" on their promotion material. Now I'm not sure of that claim as I've been using a wireless charging (Braun Oral B) toothbrush for years now and some mobile phones can also be charged wirelessly! I think it is a matter of time before all major manufacturers give the option of wireless charging. At the time of this writing this blog (May 2017) neither Festool, Makita, Milwaukee, Portacable nor Dewalt have a wireless charging option. I haven't checked any other brands yet.

The battery also has a bush button "charge left" indicator. This is 3 LEDs that light up according to how much charge is left. This can be seen on the phot above just below the BOSCH logo and lettering.
The battery itself is an induction charged device and simply is placed atop the induction charger GAL 1830 which I also bought. The battery can still be mounted on the tool so simply placing the drill on to the charger works well. The battery slides into place onto the toolwith a satisfying click. I placed the whole drill on charge for about 45 minutes before using it the first time.


Accessories

There are a range of attachments that you can purchase separately.

  • Right angle drill adapter
  • SDS rotary hammer adapter
  • Offset drilling adapter


From the 3 extra accessories I can see the offset drilling adapter to be very useful especially when fitting drawer slides. This adapter enables drilling very close to internal edges and walls. That might be a future purchase for TMc Woodworks.


The right angle adapter enables drilling at 90 degrees to the axis of the drill motor. Again great for drilling/screwing in confined spaces.


I can't really think that the SDS adapter would be any use for me as I already have a corded SDS drill. I suppose if you are up a ladder trying to drill holes in brickwork then it may be ideal for you. It will drill deep holes up to 10mm (3/8") diameter into concrete.


In use


I have had this a short time now and find that it is very comfortable to use, relatively lightweight, has masses of power and torque. It is far better than any of the battery drills I've used or still own. Drilling large holes in wood does not faze this drill. A comparison to my older drills is that the Makita would definitely bog down when drilling larger holes. The Bosch on the other hand just carries on with no changing in motor pitch.

The adjustable torque control is excellent. I've found when drilling through 3/8" holes in wood results in a relatively clean exit hole (without any backing). Of course my drills are all newly sharpened and the torque control was set to 6. When the bit broke through the clutch slipped and I found the bit hadn't gone fully through. Another slight squeeze of the trigger resulted in the bit slowly exiting the hole and very little fibre tearing. Obviously if drilling holes in furniture always have a backing board to ensure a clean exit hole.

The gearing is very smooth and the change from low speed to high speed is via a sliding switch. The drill did need to be stationary when changing gear.

Charging was a revelation. The charger can be remove from its carrier and placed on a bench, inset into a bench, works through thin acrylic or glass (so could be built into bench or charging station, doesn't get warm and is quick charging.
I don't think I'll go back to conventional chargers after trying this one out.

The LED light stays on for a few seconds after letting go of the trigger and is angled to illuminate the drill bit. Nothing different there from most other modern battery drills.

The belt clip would hold onto my belt but I don't think I would make much use of it.

The downside
I also found that fitting the bit holder to handle stopped the drill from sitting properly into the L-Boxx systainer. I removed the bit holder.

Colour coding the back of the drill is possible with the supplied plastic inserts but I found that pointless. If I had about 4 of these drills it might make more sense but I still don't think I would use colour coding.

Changing the chuck for other tools is very easy and quick. The drill body can be used on its own with screwdriver bits. There is a positive locking 1/4" holder built in.

Conclusion

There is nothing unusual in the operation of this drill as it is just that - a drill. However the addition of the optional attachments make it an attractive offering.
The main reason for buying this was to try out the wireless charging battery. It is excellent and make the drill a worthwhile investment. There are currently high capacity versions of the battery available (up to 6Ah) and Bosch is expanding the range of tools that can use the wireless batteries.
If you still have a conventional contact charged battery in a recent Bosch blue tool then you can change over to wireless as they are compatible. Check out the Bosch website to ensure beforehand though.


Friday, 19 May 2017

The rising price of old woodworking tools

I get occasional emails in my inbox from online dealers of second hand or pre-owned tools. I'm mainly interested in woodworking tools but these dealers also have tools from other crafts.
A couple of years ago (2015) the price of these were acceptable but due to the popularity driven by woodworkers to get hold of, for instance, old Stanley or Record hand tools the prices in the UK in 2017 are rocketing. A real case of  supply  and demand dictating the prices.
Now some of the lesser used tools are at the point of being the same or more than their modern day brand new premium tools like Lie Nielsen or Veritas (assuming that LN and LV are producing their version of those models). I recognise that dealers still have overheads to run their websites, have warehousing costs, wages to pay etc so they do have a mark up.
I have a fair selection of tools, old and modern (bought in the "golden age" of buying a few short years back) so I no longer have the need to collect. However if I was in the market for a speciality plane like a #95 Edge Plane (not that I am BTW ) I think I would buy a new Lie Nielsen one rather than spend more on a vintage Stanley. I don't think I would use the Stanley, instead treating it with reverence and it would end up in a display cabinet. Of course if that is what you want to do then go ahead. I like to use tools for what they were designed for - work.

That's not to say there are no bargains left to pick up. There are other websites where individuals can still sell their grandfathers rusting #4s and old chisels for a few bucks. Craigslist and Preloved both spring to mind. eBay of course can be a nightmare as you have to bid against somebody else (unless it has a fixed Buy It Now price) and may end up paying more than you should.

So if you are in the market for relatively cheap pre-owned tools best to scour sites like the latter mentioned, yard sales or flea markets rather than going to a dealer.

Tuesday, 16 May 2017

Tracksaw setting gauge

For all you users of tracksaws (Festool, Bosch, Makita etc) here is a design of a measuring gauge to make setting cuts far easier.

The one problem with cutting sheetgoods using a tracksaw is measuring. You create a good edge from stock by cutting about 1/8" off. Then using a tape measure and a pencil make a couple of pencil marks relative to this edge.
Then you set the tracksaw track onto the pencil marks and suddenly you can't see them. You move the track a little to expose the pencil line. Go to the other end and find that pencil line is 1/8" away from the rubber splinter guard. You move it back to the line, goto the other end and find you have obscured the pencil again.

This scenario does happen and sometimes you end up with a board cut that is slightly out of parallel and oversize because you covered the pencil line. There must be an easier way of setting this.
The good news is there is.

Steve Maskery of Workshop Essentials designed a simple setting gauge with integral rule that compensates for the track width and results in parallel, accurate width, repeatable cuts every time.
I take no credit for designing this but set about making one.
(Steve also says this has probably been done many times before in the dim and distant past but he was the first person to show it being created on video.)

Here is my Sketchup version of Steve's original design
Tracksaw Gauge Head


Stock

First of all I found a length of hardwood on my shelves around 1.2m (48") long. I milled this square to about 20mm (approx 3/4"). It is not essential that this is dead straight over its length and a slight about of bow is acceptable. If you can make it straight and it maintains then all the better.
Cut both ends square.
Relieve the arris on each side of the stock to remove any sharp edges and splinters.

Head fabrication

Next the head was made from a length of walnut cut to 20 x 30 x 90 mm (3/4" x 1-1/4" x 3-1/2").
I cut 2 blocks 20 x 30 x 35mm long (3/4" x 1-1/4" x 1-3/8") from walnut. Into one of these I drilled and tapped a hole for M6 (1/4" threads can be used in US). I also counterbored one end 12mm diameter x 10mm deep (1/2" x 3/8").

The walnut blocks were then glued on with a 20mm division to form a U section. I used the actual hardwood bar to space the blocks. There can be a slight amount of clearance here of about 10 thousands to allow the bar to slide easily back and forth. I further dowelled these blocks into place.

Graticule plate

Next an acrylic graticule was made from some 6mm (1/4") perspex or plexiglass I had in stock. It measures 30 x 90 x 6mm (1-1/4" x 3-1/2" x 1/4" thick) I scratched a line on the backside and highlighted it with a Sharpy to make it standout. Then I drilled 4 small holes, 1 in each corner, and countersunk them on the opposite face to the scratched line.

Then using small countersunk screws the transparent graticule plate was attached, line side down, across the blocks. All corners were then chamfered on my disc sander. I decided to radius 2 corners as a visual reminder as to which way around the reference face goes.

Assembly

Use a finger screw or machine bolt if you don't have one and insert it into the threaded hole. I found a plastic rod of suitable diameter and cut it to 8mm (5/16") long. This is the pressure washer to prevent marring the stock in use.


Then insert the stock and set it to a random length.

Calibration
The final part is calibrating the gauge. At this stage there is no scale on the gauge.

Take a random sheet from your racks and set it flat on your cutting bench. Cut one edge with your tracksaw to establish a straight edge. Then move the track over to the other edge of the board. Take your gauge and set the head to register on the straight edge, extend the stock until it touches the back edge of the track and lock the head in position.
Move the gauge to the other end of the track and ensure the track also is located correctly. 


Move the gauge back to the original location to ensure it hasn't moved.
 If you have track clamps lock them into place. The rubber strips on the underside of the track hold it into place 99% of the time but there is the odd time where you can knock it yourself.

Then make the cut with your tracksaw. Note that you have NOT measured anything whatsoever yet.


Remove the track saw and track.
Next using your most accurate steel rule take a measurement of the width of the board you have just cut. Make a note of this.

Applying the measuring tape.

You can buy self adhesive metal measuring tape that is intended just for this purpose. I bought one which came on a roll starting at 0mm and ending at 1000mm (0-39" approx). The ends of the tape have a large un-etched section intended for trimming to any size you wish. I bought one that works from right to left. You can also buy them that start from left and increase as you get to the right as shown below.


The tape is thin enough to slide underneath the graticule plate and between the face of the stock. Slide it into place and set it so the measurement you took is under the scratch line. Then using a few strips of blue tape temporarily stick the tape into place so it can't move. Remove the head.

Next cut the tape with tin shears to be shy of the end face. Now remove a small portion of the backing release paper and start sticking the tape down to the stock. Pull out the backing paper at 90 degrees to the tape whilst smoothing the tape as you go along. When you reach the first bit of blue tape remove it before carrying on. Do this until the entire tape is stuck down.

Using the tin shears again cut off the end that it surplus.

You will then have a gauge that starts at 127mm (5") or whatever the width of your track is.

Gauge head with measuring tape applied

My completed full length gauge


Reassemble the head into place and make a test cut this time setting the gauge to a determined length.

Measure the resultant board width and you will find it is spot on. If it isn't you can slot the holes in the graticule plate and move the scratch line slightly.

Improvements

You can put a brass threaded bush in the hole if you like but I haven't found it necessary


Friday, 3 February 2017

Drill collars

After years of either guessing or putting tape around a drill to bore a blind hole to depth I had had enough when I inadvertently drilled a nice hole into my benchtop. I finally bought a drill collar set! It's only taken me 40+ years.

There are many types for sale and Rutlands had a colour coded set, quite expensive as it turns out. However the reviews of them stated that the soft "protective" washer was no more use than ornament so that was no good.

Another plastic set they had was a "twist to get tighter" model that seemed to take up too much real estate area on the drill bit.

So I looked on Amazon and got a cheaper set of collars that cover 3, 4, 5, 6, 8, 10, 12 and 16mm drills for £5.29 with Prime free shipping. Hakkin 8Pcs 3-16mm Dia Woodworking Drill Bit Depth Stop Collars.
The jury is out on whether they work properly yet but they seem well made. Only one of them needs the tapped hole clearing out but I can do that.

Monday, 16 January 2017

Current hand tool storage

Here is an update on the current over bench hand tool storage arrangement in the shop (January 2017)
Now using the outside of the cabinet to store twist drills and bradpoint drills
Door open showing the inner door in closed state

Inner door swung open to reveal planes and other tools

Tool rack over the window

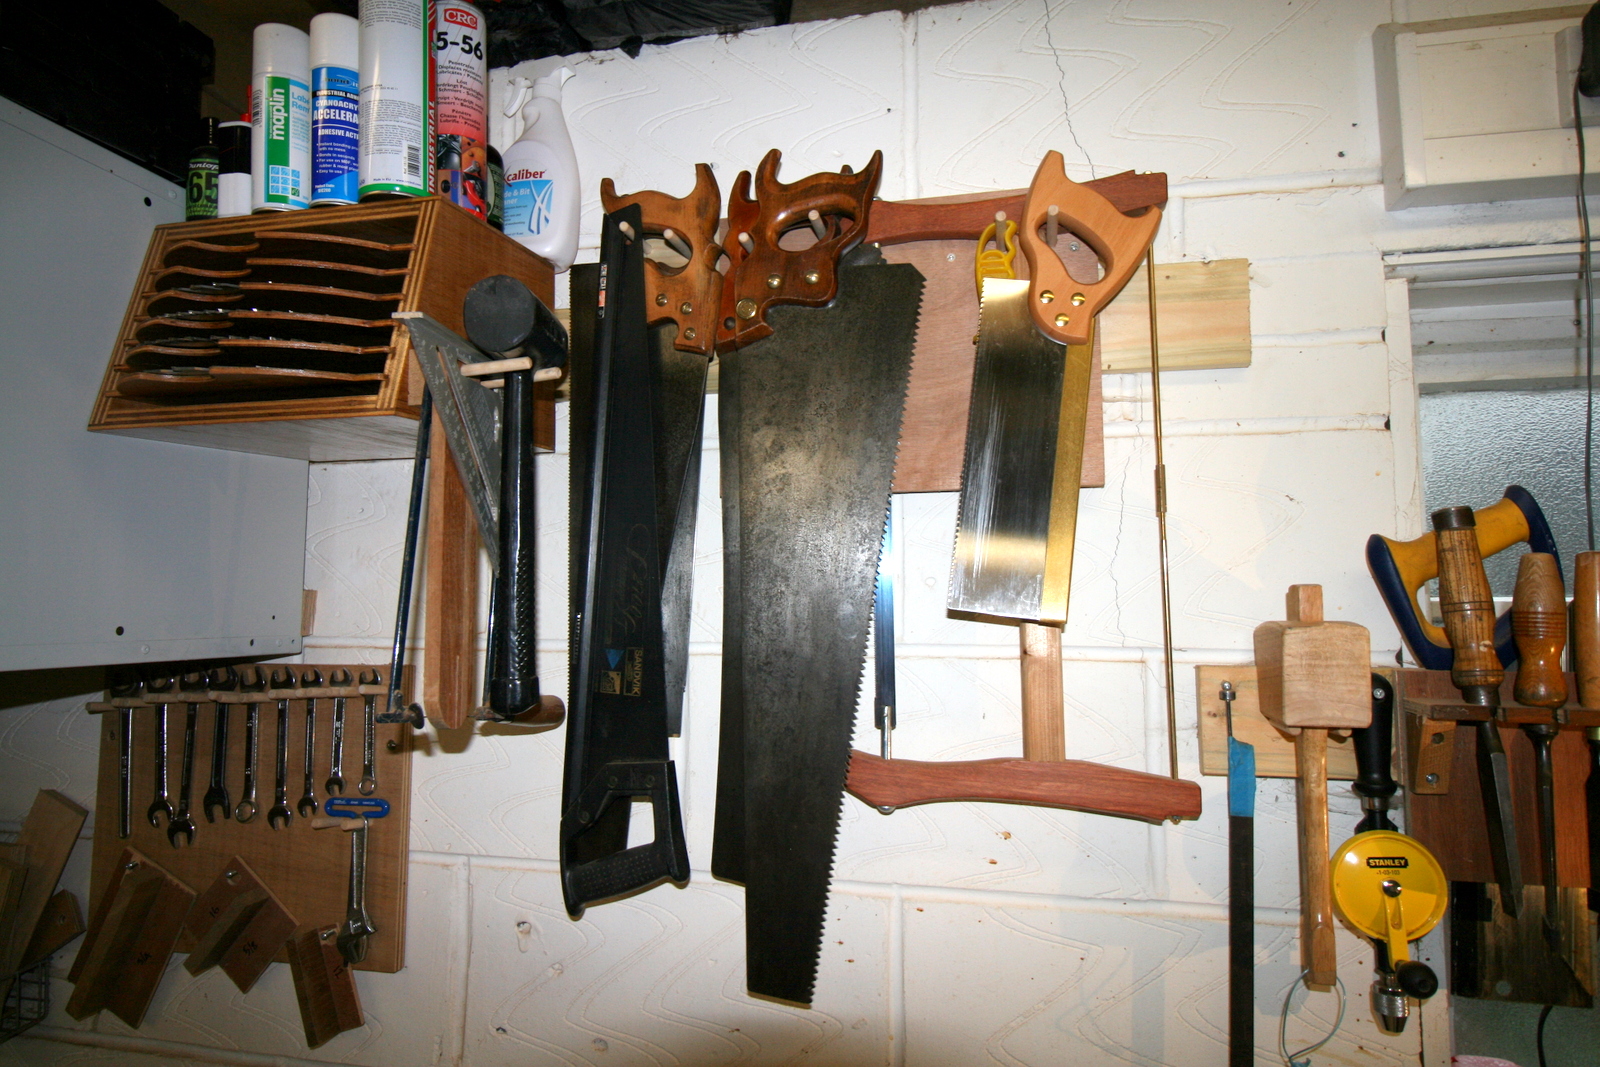
I need a proper sawtill. That is a coincidence as I'm currently building one! See later blog posts.


Friday, 17 June 2016

Bosch GKT 55 GCE Track Saw - Review

In the past you had to rely upon expensive panel saws, CNC equipment or table saws to make straight splinter free cuts. When Festool created their first track saw more than a decade ago they set the benchmark. You no longer have to struggle with 8 x 4 sheets of material getting them onto the table saw. I've been looking for a track saw for a while to prevent injuring my back and the toss up was indeed the Festool range, the Dewalt, the Makita or the Bosch. It had to be in the professional spec as I want it to last.

I had a look at the first three and the Festool TS55 was very impressive. However when I compared it to the Bosch GKT 55 GCE I felt the Bosch had the edge on the original.

So I took the plunge, so to speak, and raided the piggy bank to buy the Bosch.

What's In The Box?

The particular deal I went for was for the saw, an L-Boxx storage case, two plate tracks, joining plate, track clamps and plate carrying case.
The delivery came in two packages, a large cardboard box containing the Saw and accessories, the other a long thin package containing the tracks in their carrying case.

Monday, 16 May 2016

Bronze age saws

Well before Lie Nielsen, Bad Axe Tools Works, Disston saws, any of the Sheffield saw makers and indeed long before iron had been discovered any idea how our ancestors cut wood? They used Bronze.
I was recently in Crete and visited a museum in Heraklion and stumbled across this exhibit containing bronze age wood working tools.
The saws I guess were around 5 to 6 feet in length and looked around 1/4" thick. The ends had holes bored probably for wooden handles and the saws were intended for 2 man use. The tooth profile appeared to be cross cut without any fleam. Indeed the label with the exhibit also said it was a crosscut saw.
How the profile was cut was anybodies guess as iron hadn't been discovered at that stage.

There were a number of saws all in remarkable condition considering their age which was from around 1700BC - around 3700 years old.

I wonder how many Disston saws will be around in another 3600 years time.

3 bronze saws

Sunday, 31 January 2016

RUST!!!

I went into the shop this morning to start a day of work. I opened my plane cabinet and noticed a shoulder plane with rust on it. When I looked closer it was covered in rust despite me always oiling them (or thinking I do!) when I put them away. Then looking at all the other planes they too had a thin layer of rust albeit a little less severe on them. So out came the sandpaper, WD40 and Boeshield T9. Two hours later they were back to normal.

It appears that over the last few days humidity and external temperatures had deviated quite a lot in England. I remember going into the shop at the start of the week, opening the plane cabinet and seeing my breath inside. The shop heating was on but wasn't at full temperature. I thought nothing of it at the time and all tools were fine. The plane cabinet is fairly airtight but me opening the cabinet let in the moist air from the shop and the resulting formation of rust over the next couple of days ate at the tools while I was out of the shop.

I have some silica gel packets that are in all closed compartments/drawers in the shop but they needed recharging (been in a year or so). I put them in the oven for 30 minutes at about 100C (212F) and have put a bunch back into the cabinet.

Ironically of all the tools like chisels, saws etc. that I have in a open tool rack exposed to the air of the shop, none of them have rusted at all! So much for a "protective" tool cabinet!

So just to underline - Please DO oil any steel tools or cast iron before putting them away.

A nice pair... of saws

I was recently browsing a vintage tools website and came across these two beauties. I couldn't resist them so bought them. They were the not unreasonable £45 + shipping each.

CT Skelton small saw

The first is made in Sheffield by the CT Skelton company. It's a short panel saw 18" long with UK 8TPI. I'm not sure of the date but know they made saws from 1879 to 1953. My money is on the more recent date.

A slight amount of damage to the top horn of the beech handle

Monday, 25 January 2016

Veritas Bar Gauge Heads - Review

This is a simple but well made idea. In the past I have strapped a couple of lengths of thin scrap together to make what is essentially a variable length comparator stick. I would normally use a little blue tape to hold the two sticks together. This is cheap and works really well but Veritas came up with this simple idea a few years ago.
Each head is a circular billet of aluminium with a rectangular hole machined in the side. This part has been black anodised. There is a turned brass knob in the top of one of the clamps. Both heads are secured to their respective timbers with brass machine screws.


Like most items from Lee Valley Veritas the item is very well engineered and finished. They simply clamp two pieces of wood 3/4" wide x 1/4" thick against each other. The below photos are from pictures available on the internet (my camera is away for repair!)


In practice you make two 1/4" thick x 3/4" wide sections of wood whatever length you want. Cut a point on one end of each piece. Then slide the pieces into two of the clamp heads and tighten both screws. Each point should face away from each other. Then to use you simply loosen the screws and slide the wooden lengths so they fit inside what you are measuring. It is great for comparing across corners of a drawer, casework, cabinetry etc to square for squareness.

Also you drill an 1/8" diameter hole about 1" from the stub end of one and the pointed end of another. In the holes you simply screw some brass threaded pins (supplied) and you can cover all internal dimensions from about 1/2" to just slightly less than the length of the gauge.
So the gauge essentially has a capacity from 1/2" to the extended length of the bar. Very impressive and a very simple, effective solution.

View showing clamp heads

Using the threaded pins

What is in the box


I made mine from a few pieces of scrap beech and oak I had lying around in the shop. I made two sizes, 1 pair at 19" long. 1 pair at 30" long. This covers most of the case work I do. If I need longer, shorter or intermediate sizes it is really easy to rip another couple of lengths. I finished them with a little left over oil based finish I also had lying around the shop.

In the UK the clamp heads are available from Axminster and cost £8.46 + shipping.

Sunday, 10 January 2016

Veritas MKII Narrow Blade Honing Guide review

Having been an owner and user of the standard Veritas MKII (Mark 2) honing guide for a number of years I was aware of a few of its shortcomings.

  • Not being able to hold any of my mortise chisels
  • Poor holding of narrow blade chisels.

With the addition of the Narrow Blade attachment these limitations are no longer an issue.
I decided to buy a complete 3 piece assembly rather than the head only as I often hone wide plane blades and wanted to dedicate my original MKII to the task.

I ordered my new honing guide from Axminster in the UK and a day later received the original guide. This is not what I ordered and a quick phone call to the good people at Axminster brought the narrow blade guide in the next days post. The barcode number at the end is -10 for the narrow blade and -01 for the regular guide. An easy mistake for a supplier to make.

Friday, 9 October 2015

New jointer/planer blades fitted Axminster AW106PT2 Jointer/Thicknesser

I have just spent a couple of hours maintaining my Axminster AW106PT2 planer/thicknesser (combo jointer/planer for North American woodies)

I replaced the expensive TCT blades with some HSS blades I bought from a local tool company, Woodford Tooling in Cheshire UK, via Amazon. I have been disappointed with the TCT blades from Axminster here. They are of Chinese origin, are not as sharp as HSS and probably need honing from brand new. They are supposed to last much longer than HSS but I have had a problem with tearout on the ends of boards. This is not usual shallow tearout but massive lumps of wood been removed. No such problems with the new HSS blades.

It took about 2 hours to replace the blades, cleaning the machine as I did so. Since having the machine I have done the periodic maintenance specified in the manual, oiling the chain, oiling the bearings, greasing the massive guide shaft and waxing the beds. All very straightforward and easy to do.

The blades are more time consuming to do, I use the setting gauge supplied with the jointer, a block of wood, the tiny 7mm spanner and a pair of Axminister LED setting jigs to do the job.

I have had these a while and they needed the rare earth magnets re-gluing into the body of the gauges with CA glue as the original glue was not very good. After that the gauges have worked perfectly.
Underside of one of the jigs shown.
The rare earth magnets needed re-gluing on the set I have.
I also levelled the magnets to the surrounding thermoset plastic
by running the jig using sandpaper on a granite plate
(same technique as used when flattening a handplane sole)

Jigs shown in position on the AW106PT2.
When the blades are in the right position an electrical circuit
is made and the LEDs light up.

After fitting the new blades a test cut with oak showed the new knives cut a lot better than the TCT knives with very little noise and they are very smooth. 
I have a couple of sets of knives to be sent out for re-sharpening. Hopefully the TCT blades will come back much better than before.

I wish Axminster would produce a helical head for the AW106PT2 though. Sadly at the moment they don't and there is nothing on the horizon.

Thursday, 8 October 2015

Trend T4 Review - not good

I am a fan of Trend products as all of their professional products, routers, safety equipment, cutters etc that I own are top quality and built to last. However the T4 router is garbage here's why:

I needed a small plunge router and the Trend T4 seemed to fit the bill and at the current Amazon price point also seemed to be a bargain. I ordered one. The router itself is a 850 watt 1.1 HP machine with a plunge base which has a 30mm (1" 1/4) plunge. It comes with a pressed steel adjustable fence, a few tools, 3 sizes of collet (1/4", 6mm and 8mm), a transparent plastic dust shroud, instruction manual all enclosed in a blow moulded carrying case.

The dreaded T4

The router has an electronic variable speed control mounted on the top of the motor which goes from 11500 to 32000 rpm. The highest speeds are intended to be used for die grinding as the plunge base comes off the motor making it a hand held die grinder. For routing the manual recommends setting the variable speed control to 4 which is around 24000 rpm. The plunge mechanism itself it very smooth with external springs over the plunge shafts. There is a 3 position turret stop and a continuously variable plunge stop. The on off switch is conventiently located on the front of the router and is easily latched and unlatched. The plunge lock lever is on the rear and is in the roght position for an index finger to control.

The router and its cast aluminium plunge base are all well made and look as though they will hold up to light use. The router itself is marketed as hobby/DIY/light trade usage and as I just wanted it for occasional use it would probably suffice. I intended to dedicate it to pattern copying using guide bushes and removable collars to route cavities the exact size of cover plates. My Trend T11 is great at this but is too heavy - hence the need for a lighter smaller router.

All seems good so far.

Guide bush and collar

Trend T11 - I love this machine
First of all some explanation of guide bushes and the Trend T10/T11. I have an extensive set of guide bushes/collars - they are all standard across Trend routers - and decided to fit one to see how concentric the motor shaft is to the base. On the T10/T11 there is a sub plate that is fitted first of all and a centralization shaft (line up pin in Trend speak) is fitted into the collet. A 30mm guide bush is fitted to the subplate (innerplate in Trend speak) and the whole assembly is manoeuvred on the plunge base to get it exactly central on the shaft. Screws lock it into position. The guide bushes are fixed to this plate with countersunk screws so if you put one of a different diameter in place it will always be concentric.

Guide bush installation instructions for a T10/T11 router
And now the T4. The T4 has no provision for an adjustable subplate and the guide bushes are intended to fit into a machined recess in the plunge base. There is no adjustment at all! The router also does not come with a setting centralization shaft either. It came as no surprise that the guide bush was not concentric to the motor shaft. It was out of alignment by a considerable amount (around 1/16"). There was absolutely no way of adjusting this and for the intended purpose I had for the router it was impossible to use.
It does not come up to the high standard of the rest of Trend's products and I can't understand why they would have let this on the market with such a fundamental design flaw. It couldn't be used as I intended nor could be used in a dovetailing jig. It could however be used quite successfully for bearing guided pattern routing, edge guided routing, die grinding and normal routing duties very well.

So I have started the process of sending the router back as "not fit for purpose" without even making any dust.

I think if it wasn't for this major manufacturing/design problem the router itself would be OK.

Monday, 7 September 2015

Bedside tables (nightstands) - Part 11b - A cross cut sled

As my existing crosscut sled wasn't deep enough between its fence and the support member I had to make another. This was long overdue.

I made another from 1/2" MDF sheet and some oak and sapele scraps I had. I won't go into the constructional details of this but suffice to say it follows a similar method to Marc "The Woodwhisperer" Spagnuolo's and William Ng's sled construction techniques. Real easy to make and this is about my 6th one over the years that I have made. The other smaller one is still ok (ish) and will be used for smaller items.

No fancy shaping of the crossmember and fence.
I find it better leaving straight as you can clamps things to the fence
very easily.
There is a single mahogany quartersawn guide rail secured to the bottom of the sled and the whole underside has had a coating of wax applied. 

Sunday, 17 May 2015

Wall mounted Plane and Tool Cabinet - Part 16 - Spokeshave rack

Two of my spokeshaves are suitable for hanging using a relatively simple hanging rack.
I made this using some scrap beech. The spokeshaves, a Lie Nielsen Boggs and a Veritas curved sole, were measured and suitable holes bored into each half of the rack. Then the slots were cut on the bandsaw. The LN spokeshave went into place without any more work but the Veritas had to have some carving of the slots done to permit it to go in.

The rack was then mounted on the inside face of the outer door at the top right hand corner

The depth of the slots permits the  shaves to stay in
an upright position.

Saturday, 16 May 2015

Wall mounted Plane and Tool Cabinet - Part 15 - Screwdriver rack

I have a terrific collection of wooden handled screwdrivers, Grace USA, Lie Nielson and Joseph Marples that needed mounting in the cabinet.
I opted on putting the Grace screwdrivers on the inside face of the outdoor door. I cut a piece of birch ply to length and glued on a edge band of walnut to cover the unsightly ply edges. This was in turn glued to a right angled cleat so it could be screwed to the face of the door.
Each screwdriver was measured for diameter around the shaft collar. Holes were then laid out and drilled so each square handle butted against the inside face of the door. This would present the label showing the size of each screwdriver to me.

Then slots were cut with the table saw to enable the screwdriver shafts to be withdrawn easily.
The rack was then mounted with screws to the inside of the door.

Partially filled screwdriver rack

Wednesday, 11 March 2015

Wall mounted Plane and Tool Cabinet - Part 2 - Carcase

Most people know how to make rectangular utility/kitchen/wall boxes but if you don't here is how I did it.
The carcase is made from multiply Baltic birch plywood 18mm thick (3/4").
First of all the stock was roughly cut down using a circular saw and then cut to size on the table saw. The rear edges of the sides, top and bottom panels had a rabbet (rebate) machined in using the router table. The rear panel was also rabbetted to sit within the frame. I also machined a dado (housing or trench) into each of the side panels to locate the top of the integral drawer box.

The joints for the carcase were cut utilizing a dovetail routing jig. I decided that hand cutting so many of them were not for me this time so I broke out my little used routing jig. The default setup for my jig is half blind dove tails so I simply used this option

Open box after the initial glue up

Thursday, 19 February 2015

A Teak Wooden Bodied Smoothing Plane - Part 2

I've just got around to finishing off the plane.
A blade lever cap plate was made, again from some teak, about 3/8" thick x 1-5/8" wide x 3-1/2" long. A 30 degree bevel was cut on the leading edge and the back end rounded off. A 3/8" hole counterbored to 5/8" was drilled at the far end. A brass shouldered and threaded insert was pushed into place. The brass adjustment screw was inserted.

The lever cap needed slight adjustment on the top face to slide under the cross pin with ease.
Then it was coated with some lacquer.
After a couple of coats of shellac I applied another few coats of a waterborne gloss lacquer from ToneTech simple with a foam brush. When the lacquer had cured I set about clearing the slot of any remaining lacquer.

Then the sole of the plane was trued using some self adhesive sandpaper on a convenient cast iron surface (my table saw). The teak really does suit being used as a wooden plane and it was very easy to obtain a true surface.

The first thing to insert was the 1/4" diameter brass cross pin. This is a push fit into both holes and went in with some tapping from a deadblow mallet.

Next to be fitted was the bearing cup. This is dropped into the mortise made by the 7/8" Forstner bit and fits perfectly. I did have to remove some of the lacquer again and just had to square up the bottom of the mortice slightly as it was out by a couple of thou. This made the cup parallel and co-planer with the bed.
The bearing cup was secured with the supplied brass screw.