Showing posts with label What's on the bench?. Show all posts

Thursday, 19 January 2017

Saw Till Part 1

The New Year of 2017 gets underway at TMC Woodworks with something I have been threatening to make for a while. I have a large collection of hand saws and currently don't have a neat way of storing them. They are just hung on a few pegs on a board which is in turn hanging on a French cleat.


I need to change this arrangement

I saw a free set of plans for a Galoot Saw Till from Popular Woodworking which seemed ideal so I adapted the plans for my needs. Mine roughly follows the size and shape but instead of an open space at the bottom I installed two drawers instead. I also dispensed with the multiple sections making up the rear panel. There was a design flaw in the way that the upper crossmember was installed. The original had used dovetails. The pins in the side boards had been cut so they presented the direction of the grain to the crossmember. This is inherently weak as the pins could just shear along the grain line. I decided to use mortise and tenon joinery for this component instead.
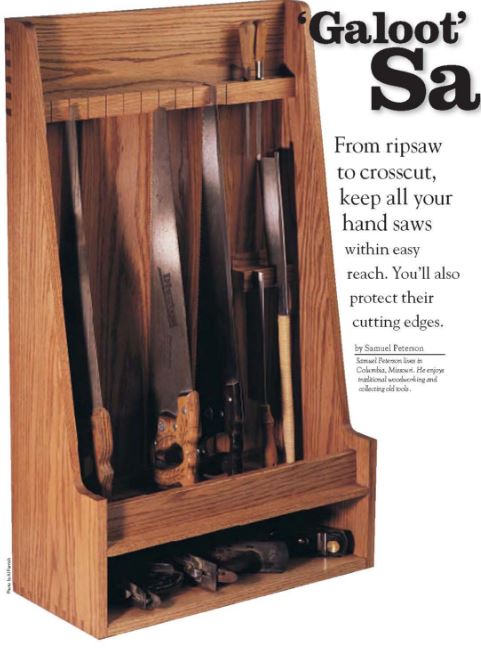
The top left of this image shows what I mean, The pins in this configuration add little or no strength as they are cut with the grain direction. If you were to hang this from the crossmember it could fail if subject to loading.
Here is my version of the sawtill


The sides of the original could be made from a single long board if you take care when cutting the profile. Unfortunately I didn't have sufficient stock on the shelves in the shop to make it as designed and I only wanted to use what I had. So like a good woodworker I compromised with what I had. I found a couple of pieces of western red cedar left over from a project so glued up a fabrication to gain enough stock. As I started just before New Year 2017 it was cold in the shop and when one of the glue ups came out of the clamps it sprung apart at the joint line. Essentially the yellow glue hadn't cured due to the low temperature. I also found that the cedar was awful to cut dovetails. It simply does not have sufficient resistance to deformity. When cutting dovetails by hand with saw and chisel the stock does need to be able to resist some pressure when chiselling. Cedar is too soft and I had wasted a couple of days on this. A new years break, work and some theatre work then got in the way of anymore shoptime for a few weeks

So back to the drawing board mid January I found some iroko and oak on the shelves so remade the fabrications again this time using West System epoxy. Obviously the sawtill would be a lot heavier now as iroko and oak are very dense in comparison to cedar. The first job was to mill the rough boards, make a glue up to get enough stock and when cured cut the side panels to shape. I cut the sides whilst they we stuck together with double sided tape.


I am a tails first person when it comes to cutting dovetails so I set about making the tailboards first. The side panels only needed tails at the bottom to hold the lower panel in place.

Friday, 25 November 2016

Not many blog entries this year

I've just realised I haven't made many blog entries this year. I have been very busy but still woodworking.
I have made two pairs of large driveway gates for instance  - 4 in total. These took quite a while to complete as I had to fit woodworking in with my life.
The frame work is iroko and the boards are western red cedar.
I finished them with a new product to me Sansin SDF in the UK obtainable from Silva Timber http://www.silvatimber.co.uk/wood-care/sansin-sdf-wood-finish.html

I bought a gallon of Roasted Almond. Not cheap at £103 for a gallon but more than enough to coat both sides of 4 gates with two coats. I still have plenty left over too.


The intention is to motorise the gates and I have made them strong enough for the motors.

I am currently working on replacing a rotted window cill on our Edwardian house. I have made the cill to the same shape as the original but just need a dry day to fit it.

Another important job to be done before Christmas is an extension to our dining table. We have many guests coming this year. I have repurposed the top from an old pine table and put walnut breadboard ends on it with a edge profile to match the existing dining table. The base is made from oak and is in the same style as the original table base. All this is being stained with General Finishes Antique Cherry Water Base Wood Stain Code GF10006. This is fairly close to the existing table colour. The oak base and pine top are the only items to be stained as the black walnut is to be left natural.

Pictures to follow.

Tuesday, 10 November 2015

Bedside tables (nightstands) - Part 14 - Completion

The final part of the tables build was to fit the various shelves in place and fix the top.
I had designed the tables to have detachable shelves and top as it would have been difficult to fit the top if they were fixed in place.

First of all the top was inverted on the assembly table and the table frame was placed upon it. This was then positioned equally about the centre line and the rear was 1/4" (6mm) proud of the legs. Then a few shallow pilot holes were transferred through the predrilled slots in the securing cleats.

The frame was removed and the pilot holes were drilled to depth and correct diameter to suit the screws I intended to use. The screws were driven in by hand, after waxing the threads, to precut the threads in the top. This also makes sure that the potential for cracking the top is minimized. Then the table frame assembly was simply screwed into place. The holes are slotted to allow for seasonal variation in the width of the top.
Blue tape used as a depth gauge

The iPad shelf was then put into place and held in position with some small countersunk screws.

The bottom shelf was then put into position and again secured with some small countersunk head screws.
Tiny countersunk screws hold the shelves in place.
They are supported in rabbets.
This photo is the underside view.

The tables were then complete and ready to go to the customer. So there you have it - a pair of bedside tables or nightstands in a single species (sapele) finished with Arm-R-Seal semi gloss.

In place

Sapele is a wonderful species to use.

Hope you enjoyed the series.

Wednesday, 21 October 2015

Bedside tables (nightstands) - Part 13 - Lining the drawers and making drawer pulls

Lining the drawers.

The customer stated that green baize was to be used to line the bottom of the drawers. So I got some self adhesive felt baize that I have used several times before and cut it to size.

Securing the baize is a breeze by peeling back 1" or so of the release paper and gradually working along the drawer rubbing it down as you go along. Final flattening with a veneer roller ensures that any air bubbles are removed.
Cutting to size

Peeling the release paper

The finished results are very good.


Drawer stops

I used a couple of counter sunk wood screws in the back of each drawer to act as stops.


Screw into the end grain of the dovetail
This is repeated on the other side

View from inside rear of the table (top off) approaching closure

Drawer fully closed

Drawer pulls

The order from the customer was to have wooden knobs of the same species as the main wood used in the tables. I had all sorts of ideas for fancy drawer pulls made from sapele but "no" came from the client. So who am I to argue.

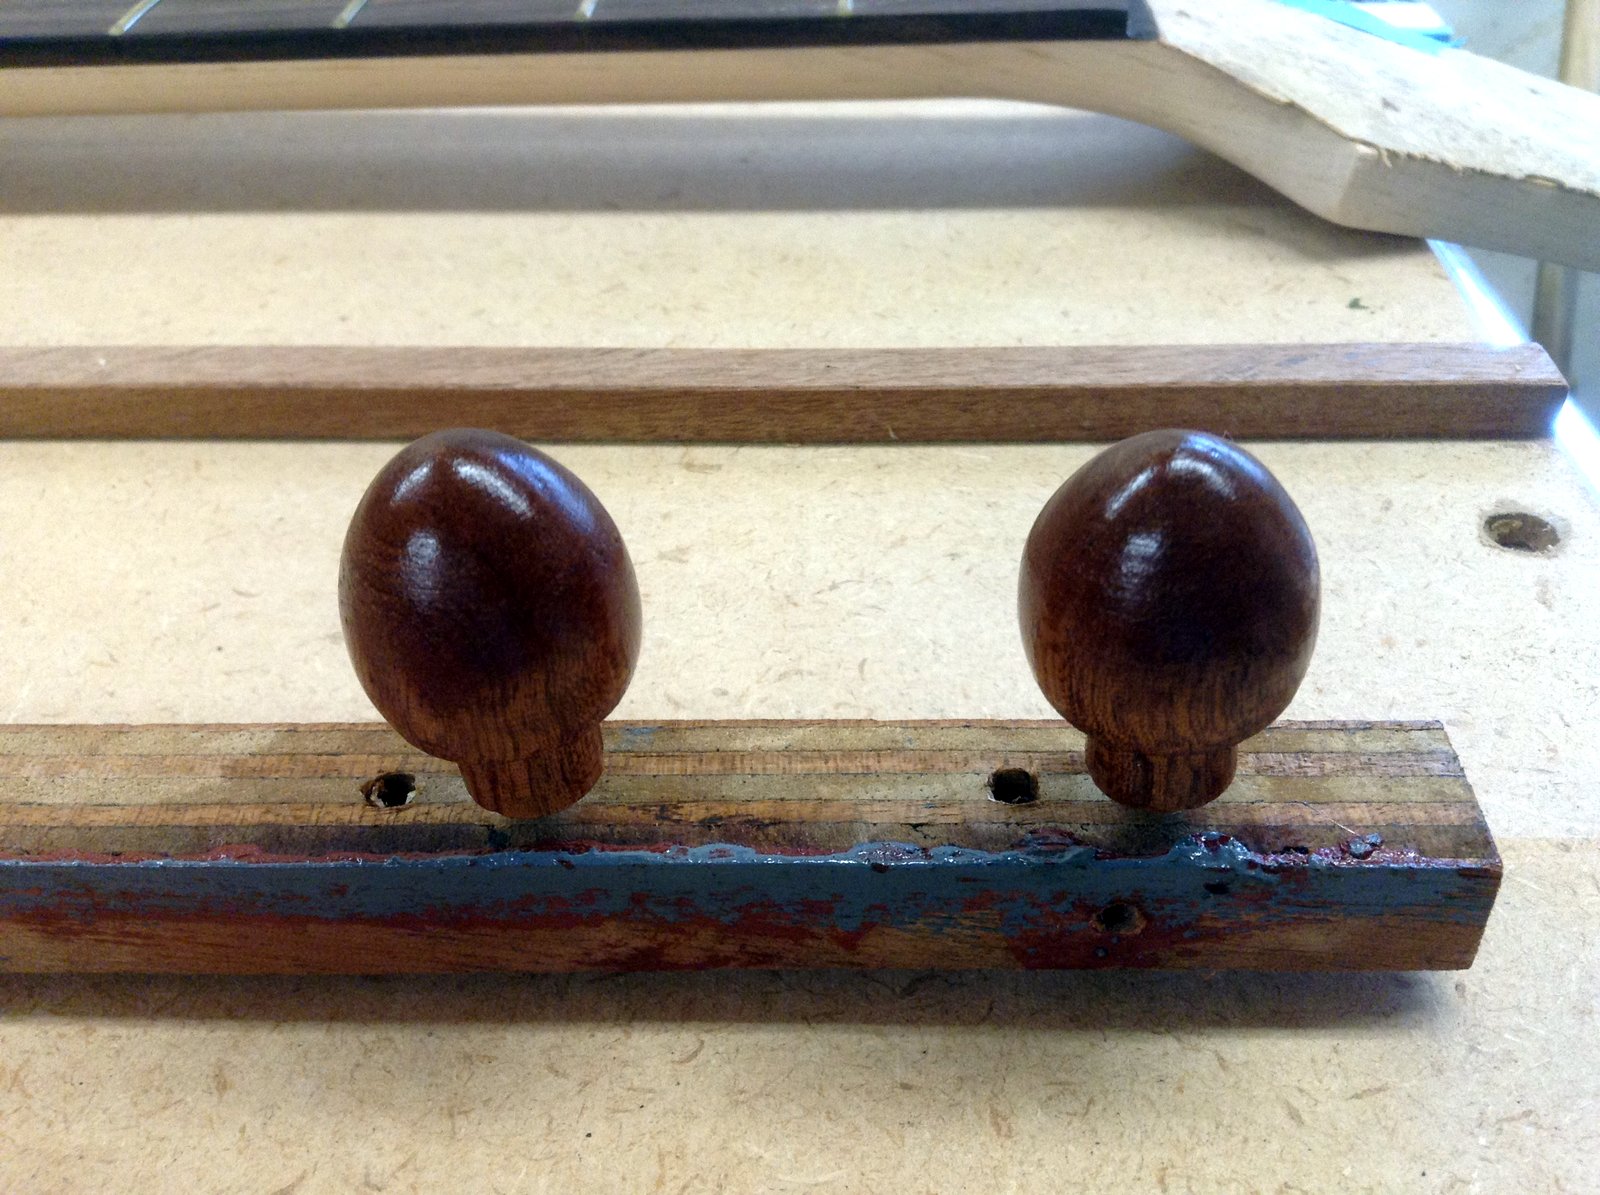
I broke out the dusty old lathe, sharpened a few gouges, dug out my calipers and turned a couple of knobs. They were finished sanded on the lathe and then when I cut them off at the base were placed into a piece of scrap wood containing a 3/8" hole. This fitted the turned tenon on the knob perfectly. It enabled me to hold the knob to cut the length down to 3/8" long (10mm). A pilot hole was also drilled for a #8 wood screw.
Finishing the knobs - they are screwed onto a piece of scrap


Then the knobs were finished with several coats of Arm-R-Seal and left to cure.

Final fitting to the drawers was simply by drilling a pilot hole, blue tape on either side of the hole to prevent break out and screwing the #8 screw from the inside. The knobs were then screwed onto the protruding screw.

The finish of Arm-R-Seal on the entire pieces really brings out the grain of the sapele.

Saturday, 26 September 2015

Bedside tables (nightstands) - Part 12 - Finishing

Sapele, like mahogany, is quite an open pored wood. It can be finished after sanding to 220grit with most finishes but leaves slight pock marks or small microcraters in the finish. To get better results I find it is best to pore fill. You can use something as basic as shellac to do this but in my years of making stringed instruments I find a proprietary sealer much better.
The one I use all the time for mahogany is a oil based thixotropic pore sealer called Jecofil made by W.S. Jenkins & Co Limited. The one I'm using for this project is Jecofil JO27 Mahogany.

This is a coloured sealer that is first applied with a foam brush with the grain. Then you work accross the grain with the foam brush to prevent it being pulled. out. The spirit in the sealer evaporates but before that you simply wipe across grain with a rag. It tints the pores slightly and the mahogany one I'm using gives a slight red/brown colour to the timber.

The sealer has the consistency of mud when stirred and it is very time consuming to do. The results when you apply finish though are simply stunning it is well worth doing.

I applied it to all the show surfaces of each table, the tops, intermediate tops and the drawer fronts. W.S.Jenkins also make Jekofil for oak but I left the secondary oak wood of the drawers natural and unfilled.

Finish.

I decided on this project to use my dwindling supplies of Arm R Seal semi gloss. After pore filling and leaving overnight I lightly sanded with 400 grit just to provide a key. This got rid of any rough bits of Jecofil that may have been remaining on the surface.
Then I gave each part of the project 2 coats of wipe on Seal-A-Cell (according to General Finishes best results with wipe on Arm-R-Seal are with SAC on first! - not me speaking :) )
After rubbing down between coats with 600 grit with a mineral spirits lubricant to make sure that I got a smooth base layer I then applied two more coats of Arm-R-Seal. On the horizontal surfaces I gave them 2 more coats (6 coats in all on the horizontal surfaces).

Some photos after two coats of Seal-A-Cell are below. There isn't much colour variation in real life as there are in the pictures. Digital camera has lied!

Intermediate tops and one drawer

Another drawer

The tables

The table tops

The results of a wipe on finish are stunning. You do have to watch for runs though and wipe them off before it cures. Good lighting is recommended when applying any finish. Once you have completed the job get out of the shop. Dust nibs can fall by air movement caused by you walking around in your shop - especially in the majority of home woodworkers non dedicated finish areas. As you build up coats the wood takes on more and more of a depth. Both seal r seal and arm r seal have tints and this changes the colour.

I left the finish to cure for 2 weeks before the next stage.

In a future project I will be using black Jecofil on an ash bodied 5 string bass guitar. You may be interest to see what happens to the wood grain on that project. I'm not sure myself but my customer was really stoked by the thought.

Wednesday, 9 September 2015

Bedside tables (nightstands) - Part 11d - Intermediate Tops (and some veneering)

The shelves were next and they were produced in exactly the same way as the top, two boards jointed and glued together.

Then I noticed a huge problem - I only had enough sapele wood for the two bottom shelves. I had miscalculated on the amount of stock I needed. Fortunately I had some baltic birch plywood 18mm thick (3/4" nominal)
and I have a heap of veneers - some are rolls of sapele. So I set about veneering the top face of some of the birch ply. Normally I would veneer both sides of a substrate to ensure flatness but this is 18mm thick and won't bend appreciably.

I don't currently own any vacuum veneering equipment yet and normally use the veneer pressing method. Essentially this involves using some cold press veneer adhesive, gluing the veneer to the ply substrate and then applying a plastic covered caul over the top of the veneer with a large weight and a few clamps holding it down while it cures.
This works fine for flat even shaped panels such as this.

Preparing the veneer

The first thing to do was to cross-cut the veneer to approximate length. I use a proper veneer saw with a craft self healing mat as a backer. I also use a safety rule as a straight edge. No point in risking your fingers whilst pressing down on a regular ruler.
Self healing cutting mat and a safety ruler

The Pax veneer saw - Sheffield England made.
When I had cut up enough lengths of veneer I needed to get it's moisture content up to stop it from bending or potato chipping. There are a few veneer conditioners that are available in the US but I can't get any of them or anything like it in England - not sure why nobody makes it over in Europe as it looks great. Anyway I just use regular tap water to spray on both sides of the veneer.

Liberally spraying with water
I first placed a sheet of ply onto the bench and a layer of paper shop rag. Then each sheet of moistened veneer is placed in alternate layers with shop rag in between making up a sandwich of veneer and shop rags.

1st sheet placed onto a plastic covered ply caul with a layer of
shop rag underneath

Subsequent layers of moistened veneer and shop rag
are placed on top to create a sandwich.

The final layer has another layer of shop rag placed over the top.
Then another plastic coated caul of plywood is placed on top and held down with some stage weights (or anything heavy you may have in your shop).
The sandwich is left overnight

Veneer glue-up.

The next day I came back and had a look at the now flattened veneers. All was good. I then used a straight edge to cut a straight line down one edge of the veneer. I also did another piece and butted them together. Sometimes you have to have another go to ensure that you get it straight.
Cutting a straight edge

Then I applied veneer tape to the upper surfaces of each leaf to hold it together. Glue was spread on both the veneer and the baltic birch ply substrate. The veneer glue I use is Titebond cold press veneer adhesive. I apply it with an ink roller.
The veneer was then applied to the substrate and pressed down with a veneer roller.
Pressing down from the centre to the edges with
a veneer roller.
The plastic faced ply cauls were brought back into use again and used to clamp the veneer/ply together and left to cure overnight.
Stage weights and extra clamps were used

Cutting the boards to size.

I had already cut the plywood substrate to size in a previous operation. When the newly veneered board was taken out of the press all that was left to do was to cut the excess from the board.

Excess cut off with a veneer saw.
You have to take care in this process as you can chip the
edges and show face of the veneer unless you are careful.
 The board was turned over and the veneer tape was removed. The boards were then cleaned up with a random orbit sander taking care not to burn through.
A finished board. I used 180 to 220 grit on a random
orbit sander to clean up.

Rabbetting (rebating) the edges.


 Each board then had a 4mm (5/32") deep rabbet applied to the underside to ensure that the top of each shelf came slightly below the shelf support rails. We had decided in the early stages of the design that this slight lip would prevent items such as pencils rolling off the shelves.

Rabbet was applied by hand with a Record #778 Rebate/Rabbet plane

So I dodged a bullet there and the moral of the tale is always ensure you have enough stock to complete the project or learn how to veneer.


Tuesday, 8 September 2015

Bedside tables (nightstands) - Part 11c - Top shaping

After cross-cutting the tops to length on my new table-saw sled it was time to produce the bevels on the underside of each top.
I have designed the tops to have a bevel on three sides only as the rear is flush with the legs and has no overhang. The bevel measures 1/4" x 1" and a pencil line is transferred onto each relevant face using an adjustable square.
6mm (1/4") deep - underside of top is facing upwards

25mm (1") wide


My table-saw is a right tilt blade which means the blade tips in to the fence. This is quite limiting as it means I couldn't construct a jig to hold the work-piece vertical whilst running on the fence to produce the bevel with the table-saw blade.
It does however have a sliding table on the left side of the blade onto which I could mount a jig to do the same thing. This is a bit of overkill for so few bevels and it is far easier to do them by hand with a few planes. This is what I normally do and it doesn't take very long.

First of all place the tabletop upside down onto the bench preferably with a spacer (some plywood is ideal) in between. The spacer servers two purposes it raises the work-piece so you are not risking planing the bench and also ensures any embedded crap on the bench does not get transferred through to the tabletop. The first bevels to create are the cross-grain ones. On the far end I like to apply a slight chamfer just in the area where the plane comes off the wood. This is to minimize break out.

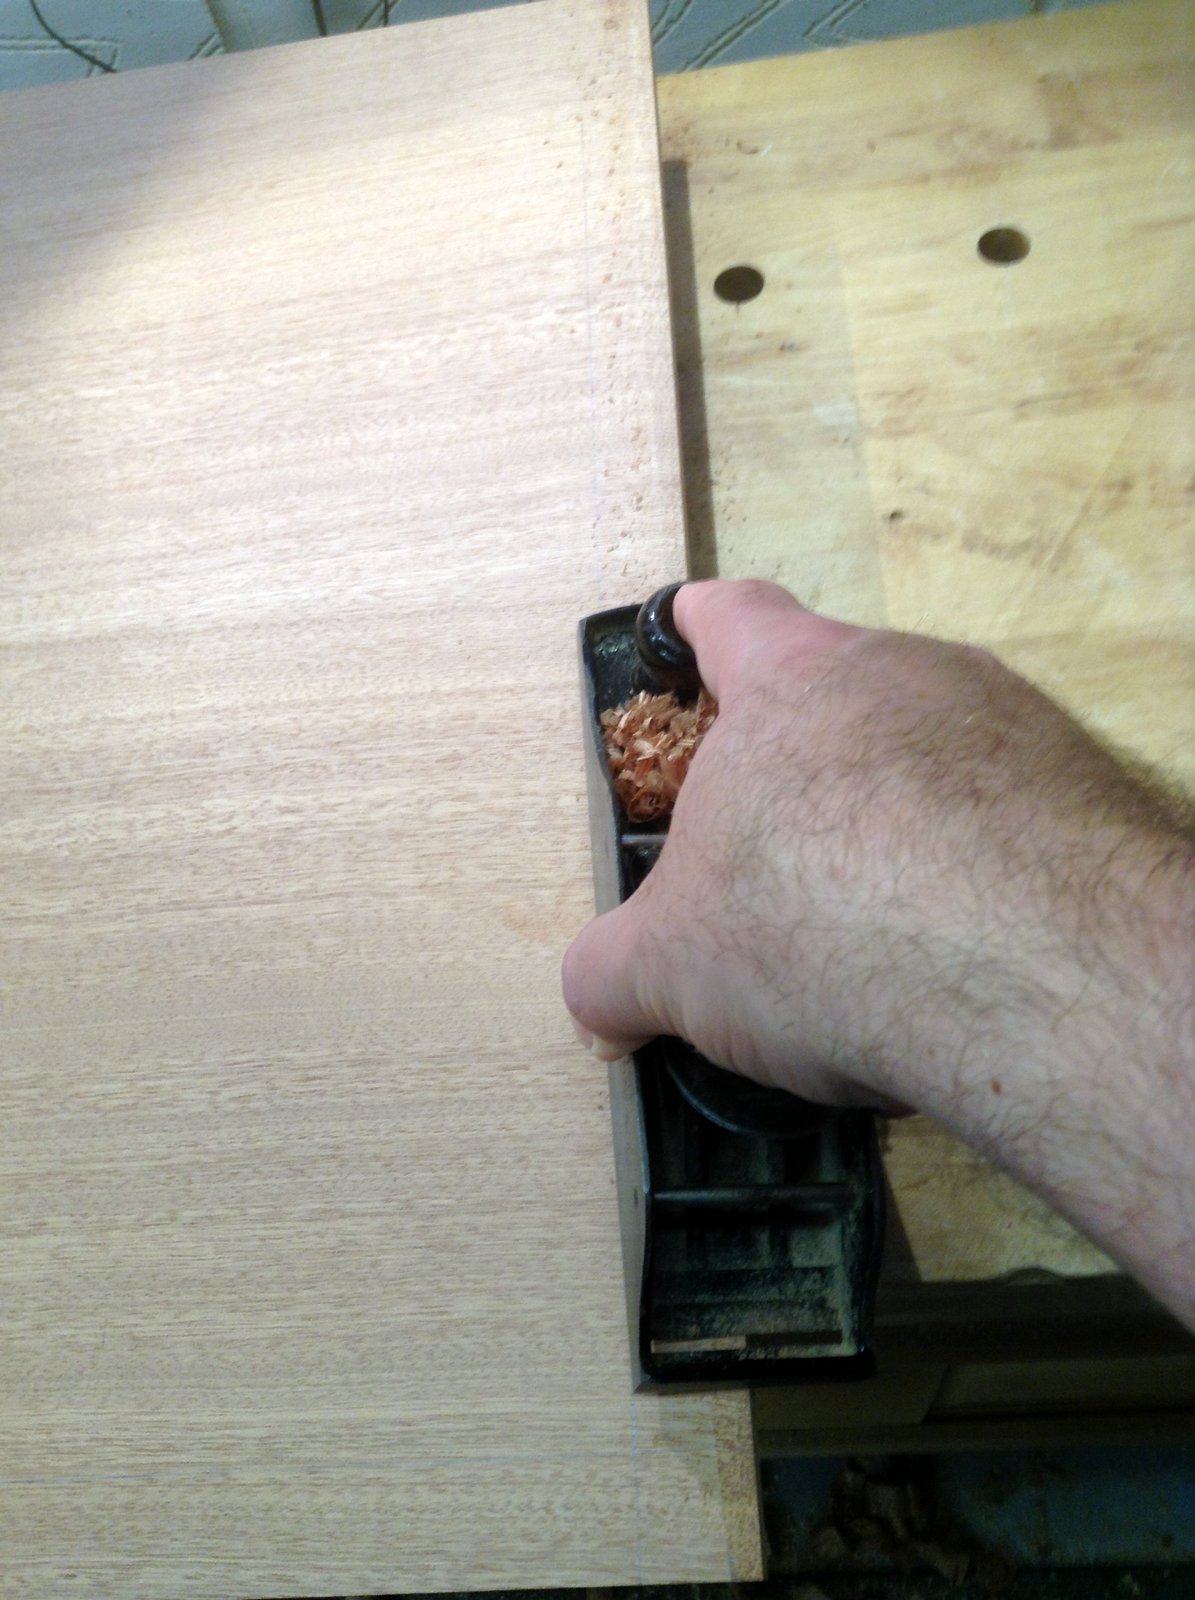
Then using a series of planes starting with a block plane, in my case a Stanley #130, set for a heavier cut I started establishing the bevel.


As more and more wood gets taken off it gets difficult doing this with one hand so I then use a #5 jack plane. I keep checking that I am getting close to the line on both faces and when almost there I stop.

Then using a low angle bevel up smoother just work slowly until you kiss the pencil marks.

I then finish off with some 80 grit self adhesive sandpaper applied to my wife's favourite grained piece of oak scrap. If you read this blog often you will be familiar with this particular "beautiful grained" item of scrap.

I then did the other cross-grain bevel using exactly the same method. The final bevel was established on the front edge with the grain. This has the benefit of cleaning up any tear-out that was produced by going across grain in the previous operation.


If you get it right the bevels will intersect with a nice 45 degree mitre. It takes me about 5 minutes to do each bevel. It would have taken me a day or so to make a holding jig to do the same on the table-saw and it wouldn't have necessarily produced results as good as this (on my table saw at least - yours might be different).

Thinning the edge of a table top down gives it the appearance of slenderness even though the actual table top is substantially thick.
The final process was to run a small ovulo bearing guided cutter around the perimeter of the upper face.

Monday, 7 September 2015

Bedside tables (nightstands) - Part 11a - Table tops preparation

The table tops are each made from 2 boards jointed and glued without any alignment (biscuits or dominoes). I milled each board to 22mm thick (around 7/8") and cut them to length. They were jointed and glued and placed into clamps to setup overnight.

After jointing the boards were checked on a flat surface

The boards are glued , in this case with Titebond II dark, placed into parallel clamps on my assembly table
and left overnight to setup.
I have some heavy duty pond liner to protect the surface from glue drips

A final check with a straightedge ensures that the boards are
flat on the clamps. If not tap them flat with a deadblow.

After emerging from the clamps the joint lines are cleaned up.
I sanded the boards both sides to 80 grit with a ROS.

The boards were then cut to finished width on the tablesaw. I then found that the boards would not fit into my crosscut sled. I needed a new one CCS fabricating so next I made a bigger sled.

Thursday, 3 September 2015

Bedside tables (nightstands) - Part 10e - Drawers - completion.

Once the front pin boards are completed and they mate perfectly with their corresponding side tail boards it's time to take a measurement from the table to cut the tailboards to length. I normally make the tailboard about 3/16" to 1/4" shy of the full inside length of the drawer compartment. Then while the pinboard is attached to the two side tailboards transfer the measurement to the tailboard.


Dimension measured from the table
Dimension transferred to the drawer with the front
pin board attached.


Then the tailboards are separated from the pin board and cut to length. I just do this on the tablesaw with the crosscut sled keeping the parts square to the blade.
Then proceeding exactly as before the tails were cut, transferred to the rear pin board and then the pins cut. This time they are through dovetails. This type of dovetail can also be done very easily by cutting the pins first, transferring the pins to the tailboard and then cutting the tails. It's entirely up to you which way to cut dovetails and I generally like tails first.

Rear thru dovetails complete

Once all dovetails and pins are cut lay the parts out on the bench and with a pencil (scribble) mark the position of the groove for the drawer bottom. I find this bit is essential as it's so easy to get the part the wrong way around on the router table when doing this. The drawer bottoms on these drawers are 1/4" (6mm) plywood. I used a 1/4" bit in the router table to cut the grooves. The pin boards are easy through cuts but the side tail boards need stop cuts on the rear edges. This is to ensure that the groove does not show through when the drawer is glued up. The front of each tail board can be through grooves as they are covered by the front pin board (half blind DTs).
A test dry fit

Then I cut the drawer bottoms to fit into the grooves. The grooves are 3/16" deep (on 1/2" stock) and the drawer bottoms are cut 3/32" less than the dimension from bottom of each groove to the corresponding part on the opposite side.

Drawer groove dimension 14 1/2" - 3/32"  (368mm -  2.5mm) 

The very next job to do is to remove the machining marks from the inside of the drawers. I used a random orbit sander up to 180 grit but could have just used a smoothing plane set to remove an absolute minimum.

Then all parts were glued up with Titebond II dark, the drawer bottom inserted into the grooves and the final side board pressed into place. When clamping I like to use a couple of clamping squares on the inside of the drawer, I normally place them on the front panel to the side panels (one on each side). Then at least the front/sides will be square. The rear panel to the sides can be slightly out of square to each other but it won't matter as that is not seen.
Then the drawers were placed into parallel clamps and left to setup overnight.

When removed from the clamps each drawer had their respective joints cleaned up with a combination of hand planes and sanding. Then each drawer would fit perfectly with a piston fit in each drawer aperture.

Drawers complete.