I submitted my bathroom vanity project to the WoodWhisperer website last year and it is showcased on today's webpage (28/01/2013)
I'd forgotten that I'd submitted it.
Check it out here
Tuesday, 29 January 2013
Friday, 25 January 2013
Axminster AW106PT2 Planer/Thicknesser (Jointer/Planer) Combo review
I decided when I designed the new shop that I could no longer put up with a deafening bench-top jointer and made a space in my machinery nook for a bigger trade rated jointer. In the UK and Australia a jointer is known as a planer. Just to add confusion to this a planer is known as a thicknesser!!!
Have a look at the wikipedia articles for the jointer here and the planer here.
So for the purposes of this review I shall refer to the machine as a planer/thicknesser.
WARNING! THIS IS A LONG REVIEW so click the read more button.
The machine arrived on the back of the Axminster truck and the driver, known as "Farmer" (as that is what he used to do before becoming a delivery driver) from Somerset, used his pump fork truck to wheel it off the truck and straight into my shop. It was in a large packing case made from particle board and was securely nailed together. I extricated it from the case and found everything inside was safe and secure. There were no parts missing and it was 95% built.
I had to clean a light layer of oil from the cast iron faces and built it using the comprehensive instructions.
Then I built a mobile base and, using the principles of the ancient Egyptians, moved the heavy cast iron structure from its pallet onto some temporary wooden blocks.
I positioned the mobile base and gently moved the machine onto it then removed the blocks. The machine then became fully mobile.
Have a look at the wikipedia articles for the jointer here and the planer here.
So for the purposes of this review I shall refer to the machine as a planer/thicknesser.
WARNING! THIS IS A LONG REVIEW so click the read more button.
Arrival
The machine arrived early January and is one of the last of the "White" series of AW106PT2 machines and I got it considerably cheaper than the "newer" Trade Series. In fact the only difference I can see is a different label on the outside and the specifications say the cutter head spins slightly faster.| You don't really want to see a picture of a packing case DO YOU??? Well here it is! |
| The fence is still wrapped in plastic here |
| The inner workings |
| Now mobile but fence not fitted yet |
I had to clean a light layer of oil from the cast iron faces and built it using the comprehensive instructions.
Then I built a mobile base and, using the principles of the ancient Egyptians, moved the heavy cast iron structure from its pallet onto some temporary wooden blocks.
I positioned the mobile base and gently moved the machine onto it then removed the blocks. The machine then became fully mobile.
Thursday, 24 January 2013
Sharpening station
One of the problems woodworkers have is blunt tools. How many times have you tried cutting something to find that the chisel/plane has lost its edge? You can't be bothered to get the sharpening stones out and carry on regardless. Your work may suffer as a consequence.
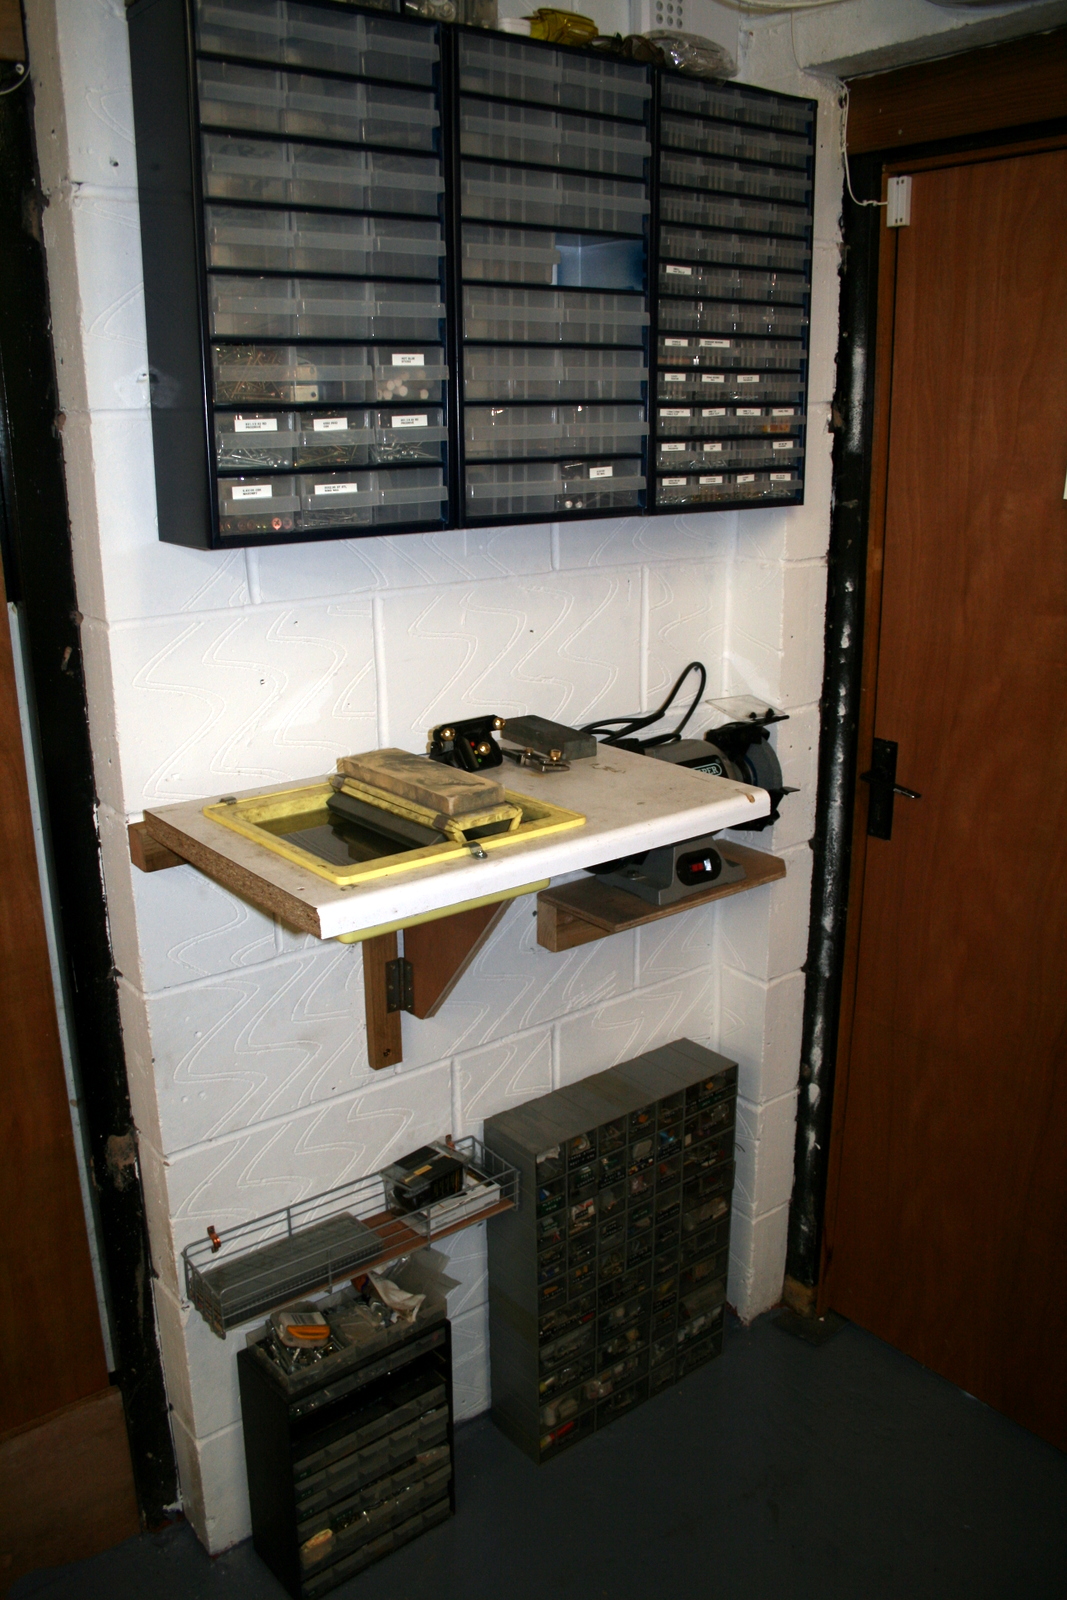
I had a set of Japanese water stones, a water pond and a 6" dry stone grinder. So I just built a folding table with a cutout for the water pond and mounted it on the wall at about 36" from the ground. This I found was an ideal height for me either standing or sat on the shop stool.
Using the Veritas MKII honing guide system with flat roller, cambered roller and offset skew gauge I am able to quickly put an edge back on a chisel or plane iron and get back to work. I also can grind any of the lathe tools on the dry stone using a shop made guide.
I put all the tools into an open mesh storage bin underneath the table and have quick access to any of these peripherals. There is also a flattening stone that can be used to flatten the waterstones when the inevitable furrow is ploughed.
The pond is fixed into the table using three quick release clips so I can empty it of water. Then when the table is folded down flat to the wall it doesn't fall out.
In the view you can also see the storage system I have in use. The three cabinets above the station are the widely available Danish RAACO 150 system.
I have the RAACO 16, 24 and 48 DRAWER 150 SERIES CABINET versions.
These comprise a dark blue painted steel cabinet with polypropylene drawers.
It is so much easier to find a woodscrew now as I have labelled the drawer fronts. No more searching around in cookie jars!
TMcWoodworks solution
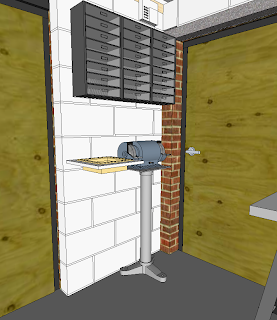
When I designed my new shop I put in a space for a permanent sharpening station where I could go when any of the aforementioned tools were losing their edges.I had a set of Japanese water stones, a water pond and a 6" dry stone grinder. So I just built a folding table with a cutout for the water pond and mounted it on the wall at about 36" from the ground. This I found was an ideal height for me either standing or sat on the shop stool.
Using the Veritas MKII honing guide system with flat roller, cambered roller and offset skew gauge I am able to quickly put an edge back on a chisel or plane iron and get back to work. I also can grind any of the lathe tools on the dry stone using a shop made guide.
I put all the tools into an open mesh storage bin underneath the table and have quick access to any of these peripherals. There is also a flattening stone that can be used to flatten the waterstones when the inevitable furrow is ploughed.
The pond is fixed into the table using three quick release clips so I can empty it of water. Then when the table is folded down flat to the wall it doesn't fall out.
![]() |
| Sketchup design concept |
| Sharpening station (It looks very similar to the design!) |
In the view you can also see the storage system I have in use. The three cabinets above the station are the widely available Danish RAACO 150 system.
I have the RAACO 16, 24 and 48 DRAWER 150 SERIES CABINET versions.
These comprise a dark blue painted steel cabinet with polypropylene drawers.
It is so much easier to find a woodscrew now as I have labelled the drawer fronts. No more searching around in cookie jars!
Now to sharpen all these chisels in my tool rack!
| Tool rack design will follow in a future post. |
Monday, 14 January 2013
Combo bench-hook/shooting board
I was having a look around the internet earlier and stumbled upon the excellent feed from Blair Glenn. Here he shows you how to use a combined bench-hook/shooting board in this video from his Facebook feed.
He has many videos and is an arborist by trade and some of the videos reflect upon a pretty awesome profession.
I'm off to the shop to make one. I can then dedicate one of the cheaper planes I have to the task. I have a very cheap Groz number SP-4 smoother (a copy of the Stanley #4 bedrock) that is actually very good, once it was tuned up, having square sides relative to the sole plate (some planes are not square) so will be great for use on the shooting board. I must have got lucky as the Groz planes don't receive many favourable reviews.
I tend to use Japanese pull saws and they don't work that well on bench hooks. I shall have to look how the Japanese woodworkers have an equivalent to a bench-hook I doubt it as they sit down on the floor when they work wood.
Making one couldn't be simpler.
Follow Blair's advice in the video on how to use it.
He has many videos and is an arborist by trade and some of the videos reflect upon a pretty awesome profession.
| Groz SP-4 boat anchor smoothing plane (not in my case as I was lucky!) |
I tend to use Japanese pull saws and they don't work that well on bench hooks. I shall have to look how the Japanese woodworkers have an equivalent to a bench-hook I doubt it as they sit down on the floor when they work wood.
Making one couldn't be simpler.
![]() |
| Measure the distance from the side of the plane to the blade |
- Cut a piece of 1/2" plywood about 9" x 12".
- Cut another piece of 2-1/2" x 1" x 6" hard wood such as rock maple (that's what Blair used on his).
- Cut a piece of 1-1/4" square x 9" long softwood and glue/pin/screw it to the underside of the board at the end closest to you.
- Glue the rock maple on the top piece of the board furthest away from you. You can square it up to the edge of the board if you desire (not critical).
- Measure the distance from the edge of you plane to the edge of the blade distance X in the picture.
- Find a piece of plywood stock that is around that thickness (normally 3/16"or less thick ) measuring around 6 x 8
- Square the end of this board relative to the side (this is the critical bit).
- Glue this piece to the board (or screw it down) so it butts against the rock maple and is in line with the end grain of the maple.
- You now have a planing guide.
- Take your favourite cross cut saw and accurately cut a kerf in the maple block that is square to the face. That is now your bench hook guide.
Follow Blair's advice in the video on how to use it.
Subscribe to:
Posts (Atom)