Tuesday 23 December 2014

Record Power AC400 air cleaner safety issue

I've received notification that AC400 air cleaners have a faulty circuit board that can cause significant overheating problems. My AC400 had a burnt out circuit board back in October 2013 and I received a new board. However I'm led to believe that they too have the same fault and Record Power have now redesigned the board. They are recommending every machine is unplugged and to contact them for a replacement.
This was mine. You can see the burning
on the PCB, Fortunately the fuse had blown too.


Here is the content of the email:


AC400 Air Filter Safety Notice


In the last few days we have had a small number of AC400 Air Filters returned to us with significant overheating damage to the circuit boards inside. Whilst the boards are made of relevant certified flame retardant material, the damage is of a level where we feel we must recommend that all affected machines are issued with replacement boards and the machines are not used again until the boards are replaced.

Whilst we believe the overheating problem is restricted to machines manufactured up to June 2013 (up to serial number 20131416) this same basic board design was used in different generations until a completely new board was developed to incorporate a number of improvements. There are no known problems with the later board which is in current use. The format of current, unaffected serial numbers begin W14 with a further 6 digits and any serial numbers from W14001617 are unaffected.

If your machine is outside that range or if you cannot find your serial number you should unplug and cease to use the machine until you can contact us and we can arrange the necessary board replacement. If you are in any doubt as to whether your machine is affected or not we recommend you also unplug the machine and cease to use it until you have contacted us.

We are now making replacement boards but these will not be ready or in our stock until  week commencing 5th January so we apologise for the inconvenience this will cause. We can assure you we are doing everything we can to make the necessary parts and offer a solution as quickly as possible but felt it was important to raise our concerns over the possible safety issue immediately.

If you think you are affected or have any concerns please contact us via the following means;

Email: ac400@recordpower.co.uk
Telephone: 01246 571040

The office is closed from 24th December until 5th January. We have a team ready to deal with your messages and questions from 5th January when we should also have the first batches of replacement parts. We apologise once again for any inconvenience this causes.


 Record Power Ltd, Centenary House, 11 Midland Way, Barlborough Links, Chesterfield, Derbyshire, England, S43 4XA
Tel: 01246 571 020 - Fax: 01246 571 030

Wednesday 3 December 2014

LN Brian Boggs Spokeshave

This simply is the best spokeshave I've ever had. The Lee Valley and UK Clifton ones I also have are a joint close second (just a hair away from the Boggs) distantly followed by Stanley spokeshaves of which the modern versions quite frankly are not worth the metal they are cast from nowadays.

The mighty Lie Nielsen Boggs flat bottomed spokeshave


Sunday 23 November 2014

Garden Gate Part 17 - Completion

This is the final part of the build. The gate is done.

Fitting the hardware was easy as drilling pilot holes for the stainless steel fasteners was easy enough to do. This is oak and as you may know it eats mild steel for breakfast. You find that mild steel leaves black marks on oak over a period of time outside with the tannins in the oak reacting with the iron in the steel. Stainless steel on the other hand has no such issues.
The hinges were first to be fitted, the hinge brackets were then positioned with enough clearance on one of them to enable expansion/contraction of the wood and metal.

I use a Vix bit to centre drill each of the the hinge fastening holes.

VIx bit used to centre drill the holes
in the hinge bracket

Tuesday 18 November 2014

Garden Gate Part 16 - The Hinge Post and Striker Post construction

I didn't have enough stock to make the hinge post from one piece so ended up glueing 3 pieces together to get the required rough dimensions.
Then the whole assembly was laminated together.

After the epoxy had cured the post was cut to length and the rainwater run-off angle cut on the top.
My 10" table saw is not quite big enough to be able to take a cut this deep so I broke out the cross cut tenon saw.

Wednesday 12 November 2014

The clamp wall

You can never have enough clamps. These are a few I've put up on the wall in the shop.

Some parallel clamps


Some F clamps and smaller
parallel clamps


Wednesday 5 November 2014

Garden Gate Part 15 - The Hinge Post design

Ordinarily I would not even consider documenting a piece of wood bolted onto a brick pillar. But as this project has become somewhat of an epic I think it needs recording.

I wanted the post to follow the same lines as the gate but have the following criteria:

  • Made from same species
  • Capable of mounting the hinges
  • Capable of being bolted to the brick pillar
  • Should follow the same lines as the gate
  • Have rainwater run off
  • Be finished with the same varnish.


So out came Sketchup again and I drew the post. I also drew in the hinges that I am using with corresponding mounting holes. These are 2 feet long. The top mounting bracket will be mounted upside down to prevent the gate being lifted from its hinges. There is also a self return spring to close the gate. This too had to be modelled in Sketchup. All those models are now available in the Sketchup 3D warehouse as I've uploaded them for other people to use in their projects.

The physical spring is made from stainless steel and the hinges are made from mild steel that has been heavily galvanized. The intention is to fix all the hardware with appropriate stainless steel fasteners to avoid rot and blackening of the oak.

Hinge post detail.
I have opted for 5 - 10mm  (3/8") diameter shield
bolts to secure the post to the brickwork.
All the load is transferred to the lower hinge bracket.

I was running out of white oak but had sufficient left to make both the hinge post and striker post. However I needed to do some judicious laminating to gain enough stock.
After the epoxy had cured I milled the post to dimension and glued a face board on what will be the front (as viewed from the road). The overhang of the facing board is not strictly necessary as it doesn;t do anything apart from hide the gap between gate and post. But it looks attractive especially with the top detail seen here in the Sketchup representation.

Top of hinge post detail.
The decorative brickwork at the top needs
chasing out slightly. This will be done on
site when the gate is about to be mounted.


Tuesday 28 October 2014

Garden Gate Project - Part 14 - More finishing and gilding

Finishing can be really boring. The gate requires 7 coats of varnish all over and the application of which is very time consuming. Each coat needs 24 hours between drying and every other coat needs rubbing with 320 grit. Also the dilution of each coat gets less between coats until you end up with the varnish going on neat from the can.
I hadn't worked out a way of coating each side at the same time and the gate is too heavy to place onto painters pyramids or a simple bed of nails. So consequently 7 separate coats ends up taking 14 days to achieve. No pictures of paint drying I'm afraid.

In the meantime we have had guests over from foreign climes and we have been hosting for them. I did manage to get a little shop time last Sunday whilst they went to a Manchester United football game against Chelsea. I have absolutely no interest at all in football so had a few hours in the shop.

I decided to highlight the letters of the sign with black paint and gild the numbers with gold leaf.
The signs all had a base coat of shellac followed by a thin coat of spar varnish. When that had thoroughly dried I started to apply so black enamel paint. Unfortunately this paint was water based and would not take to the now varnished over letters! DOH!. Luckily I had some oil based exterior black gloss paint so carefully applied that paint instead.

Dunluce is the name of our house

Monday 20 October 2014

Garden Gate Project - Part 13 - Finishing

All surfaces sanded to 180 grit, my makers mark branded on and then the first coat of Epithanes spar varnish. This is thinned to 50% using either mineral spirits (known as white spirit in the UK - this is not odourless in the UK) or Epithanes thinner. I used the latter as it is odourless and is the same price as white spirit.

Just another 6 coats to go! Gradually reducing the amount of thinners to get to full strength eventually.

Sanding complete

Not bad amber tint for first coat
It will get deeper with more coats


Thursday 16 October 2014

Commercial Benches bench dog hole layout.

One of my friends on Woodtalk asked me about where to position dog holes. He had built a great bench and just needed some drilling details. My bench is a commercial bench made by Sjobergs here and is adequate for my use for now.
I don't use all of the dog holes but do tend to use quite a few of them at the left-hand end when using a hold-fast. I do find that having such a grid of holes is advantageous as I also use Bench Cookies with risers. The risers fit in a 3/4" hole and having the flexibility of so many hole is great.

Here are a few pictures of the bench dog layout from the lefthand end of the bench.

Longitudinal spacing

Tuesday 14 October 2014

Garden Gate Project - Part 12 - Glue up #2

I like the smell of epoxy in the morning.


After the glue had cured the pieces of wood that were protruding from the mortises were cut off.
Then using a combination of flush trim saw, various block panes and that DIY tool that never gets used in fine woodworking, the Black and Decker belt sander (!), the joints were all sanded flush. It really is the right tool for the job and I bought it many years ago to sand a table with it ending up on the shelf ever since. I have a new found fondness for a power tool.

Using a Japanese ryoba saw to saw off excess

Friday 10 October 2014

Garden Gate Project - Part 11 - Glue up

The glue up is a multi stage procedure:

  • Top rail, mid rail and mullions sub assembly
  • Lower rail, stiles to the previous sub assembly making the carcase assembly
  • Vertical boards to gate carcase assembly
  • Diagonal supports.
The reason for approaching the glue up in this way is to stop panic when the glue is drying.
The mullions were generously coated with epoxy glue as were their corresponding mortises in the top and mid rails. They were inserted and the side stiles were attached without glue and everything squared up and clamped.


After leaving overnight to cure the stiles were removed and the first sub-assembly was complete.


The next evening and there was a little squeeze out to clean up. As a bench chisel will not now fit in I used a chisel plane.
Chisel plane - you never know when you'll need one.

Paring the glue with a bench chisel.

Then the panic sets in when you have to coat tenons with glue and poke glue into the mortise's. All the time you are aware of the glue setting up but with West Systems Epoxy you still have plenty of working time.
After all the tenons were inserted, the clamps added, the piece checked for squareness then the wedges are coated with glue and inserted. Insert them both in both tapping with a hammer.
In the meantime glue is dripping out from all orifices - don't worry about it you can clean it up tomorrow (or leave it in globular form on the floor!)
The important thing is that all the joints are fully coated adding to its longtime water resistance.

Clamps on and wedges inserted.
Wedges in

The next job after curing will be cutting off any excess and cleaning up the excessive squeeze-out. Then the boards and diagonal supports can be cut to length and glued in.


Thursday 9 October 2014

Garden Gate Part 10 - More signs and preparation

As there were many more letters to be carved I decided to have a look at the Milescraft Signpro. Essentially this is a routing template comprising letters, numbers and some punctuation marks.
The set I have is the 1212 which has a full range of 2.1/2" high and 1.1/2" high characters. It also has 2 different diameter long series router cutters, various low profile clamps, universal router base and various accessories to enable the user to make long signs.

In use the template couldn't have been simpler to use but after routing some letters still needed some work with a chisel to clean up. Also some light sanding cleaning up the routed characters was needed.
The finished results were acceptable and saved a lot of time. I know I could have done it using Norm's manual method as mentioned in a previous post but I'm all for time saving measures.

I then had to route pockets in the oak cross rails to inset the signs into. The reason for this is the stock I used to make the signs was 3/4" thick and I only wanted the signs to protrude around  5/16" or so.

Cleaning up the end of the pocket
in the mid rail

Thursday 2 October 2014

Barrel making part 1 - an old jointer

This cast iron jointer was on display at the Hennesey brandy factory in Cognac, France.
I think it is 8" wide but can't be too certain as I couldn't get too close. It may be 10" wide.

Originally driven by a line shaft
now powered by electric motor.

Tuesday 30 September 2014

French furniture part 2 - La commode


 Otherwise translated as a chest of drawers.

A side view in situ
This piece was quite large, not sure of the age (again more knowledgable readers could suggest a originating period) and worn in several places. It had veneer in several places and really was in need of sympathetic expert restoration. Essentially it comprised a base unit with 4 wide drawers, and upper unit with a mirror and two integral small drawers.
The top was damaged probably by water and the veneer was missing in several places.
The bottom has some turned features with interesting square details ending in turned feet.

Nicely proportioned chest
of drawers with ornate
mirror unit on the top
One thing that shows the integrity of a dovetail joint was that most of the drawer fronts no longer had any glue but still the handcut dovetails were as strong as the day they were made.

French furniture part 1 - La table de chevet

I start a series of some interesting furniture I have found in my travels around France in the September of 2014.

La table de chevet

Here is a good example of a bedside table that shows the importance of trying to keep woodworm in check.

The piece is an antique of unknown age, (maybe a knowledgeable reader could supply the period of manufacture), it has wonderful pierced cabriole legs, a shaped top and a single lockable drawer in the front apron. The dovetails in the drawer were all handcut and the base was made from 3 boards of oak glued together and roughly cut to fit in grooves cut into the drawer sides and front.

On the face of it the table looks fabulous

Garden Gate Project - Part 9 - Carving letters and numerals

There is a New Yankee Workshop episode (Season 17 episode 12) where Norm Abram showed how to make carved wooden signs.


This was a really interesting show where Norm was showing how to cut letters and numerals in several ways:

  • By hand using carving tools
  • By CNC machine
  • By hand using a router.

Wednesday 10 September 2014

Garden Gate Project - Part 8 - Shaping the stiles

As the top of the stiles had been left cut longer it was a simple job to mark out and cut the tops.
I was going to make a template to do this but found an ideal one in my drafting equipment. It is an acrylic protractor. It is the exact size I wanted.

First of all I marked out some base lines 40mm (just over 1.1/2") up from the top of the upper mortise. Then I marked out another line 60mm (just under 2.3/8") further on from this line. Then I simply joined the dots. I projected this around to the other face and marked that too. This is just as a visual reminder when cutting. You don't want to cut the wrong piece out at this stage!

A protractor used to mark out the curve

Tuesday 9 September 2014

Garden Gate Project - Part 7 - Tongue and Groove boards

The tongue and groove boards were made next. To do this some 6/4 oak was roughly cut to width. Then each of these boards had one face cleaned up and an adjacent face jointed at the jointer. Then, using a wider blade on the bandsaw, each board was carefully resawn. This produced two boards of roughly 18mm thick (just under 3/4"). Then each board was run through the thickness planer to finish at a hair over 15mm (just less than 5/8") thick.
Resawing some 6/4 oak


Thursday 4 September 2014

Garden Gate Project - Part 6 - cross bracing

Cross bracing for the lower section of the gate is essentially to aid long time stability. The bracing needs to be less than 45 degrees to each stile otherwise the braces are not actually doing anything. The timbers were milled and cut to length. I chose an angle of 40 degrees and marked out each cut. Then using the tablesaw and mitre gauge the cuts were done.
Mitre gauge is set at 40 degrees

The braces are left long at the moment.

As this exposes a lot of endgrain, engrain glue joints not being very strong, each end will have a #20 biscuit slot cut into them. A corresponding set of biscuit slots will be cut into the top of the bottom rail and the underside of the mid rail. Then the lower rail could have its top face bevelled to aid rain water run-off. A straight portion was left at each position where the bevel mates to the lower rail.

After initial glue up the braces will be trimmed to their final length and glued into place with the biscuits.


Tuesday 2 September 2014

Garden Gate Project - Part 5 - Mullions, lower rail and dry fit

The mortises for the mullions were cut in a previous process so fitting the mullions was a simple process. First of all the stock was milled to a hair over 18mm (around 3/4")  thick and one face jointed. Each component was cut to length and then cut to final width.
Fitting the mullions was just using the smoothing plane on all faces which removed all milling marks and produced a sliding fit.
A pile of mullions

Thursday 28 August 2014

Garden Gate Project - Part 4 - Top rail profiling

Template making and bandsawing

We had decided that the top rail would be curved long ago during the projects inception. Originally we had planned for the top side and undersides to be curved but this may have proved to difficult to pull off especially since a lot of the oak had voids in it. We didn't want to chance cutting into voids so the underside of the rail remains straight.
However the top of the rail is going to be curved. A template was duly made. This was done by drawing a grid over the top of the rail at 25mm spacing (approx 1"). The half image was exported out of Sketchup as a PDF file to full size.
Gate top curve template
This produced around 3 pages that were pasted to a scrap of 1/4" plywood using some 3M spraymount. The grid was used simply to join the paper sheets together at the correct spacing

Wednesday 27 August 2014

Garden Gate Project - Part 3 - Top and middle rail with tenons and mortises

More mortises

The top and mid rails required mortises to house the mullions. As the the top and mid rails had already been jointed it was a simple matter of defining a mid point on each and then marking out for each of the mortises.
I normally use a striking knife and undercut with a chisel on my joinery to produce crisp, clean results. The knife line also makes it easy to rest a chisel bevel into.
The pattern bit we have that is 1/2" diameter was measured. The cutter length was 25mm (1") and the bearing thickness was 6mm (1/4"). This dictated the depth that I needed to go to use my method of cutting a shallow clean mortise and cleaning to depth with a router.
Mullion mortises complete

Wednesday 20 August 2014

Garden Gate Project - Part 2 - Stiles and thru-mortises

The timber (American white oak) was jointed and thicknessed to 70mm thick x 100mmm wide x 980 long (2.3/4" x 4" x  38.1/2").
I had to do some remedial repairs to one of the stiles as when I cut it to 100mm strong I found a flaw. It was inside the wood and wasn't apparent from the outside.
Maybe the timber had been either dried too quickly or taken from too close to the core of the tree (the annular rings on that piece look around 14" diameter)? or both. So I thought I would just rip some more off with the table saw a little at a time (1/8" bites). 5/8" off the width and a pile of sawdust later I managed to get to "almost" good stock again. I glued one of the 2" wide x 3" thick pieces that I took off one of the other pieces back on with some epoxy. After it had setup overnight I cut the piece back to width again.
I also thicknessed and jointed the top rail and middle rail but still had them long.

Next I set to work marking out the mortises. Then using a chain drilling technique I drilled the through holes at the drill press.
Chain drilling is drilling a series of holes close
together and then removing
waste between the holes and therefore
creating a pocket.

Tuesday 12 August 2014

Garden Gate Project - Part 1 - Design and timber selection

Not strictly fine furniture, a shop project or a musical instrument but essential all the same.
My next project is an oak garden gate and has been commissioned by my wife Elly to showcase TMc Woodworks to people who come to our front door.
I have looked around and didn't find any plans that suited so I designed the gate myself.

Street view

Thursday 7 August 2014

Pattern Routing Work Holding Jig

Fine Woodworking magazine for the month of  July/August 2014 issue 241 has plans for a Smart Jig for Pattern Routing by Tim Celeski to hold a template and work-piece when pattern routing. Over the years I have made occasional jigs to do such things but they have always worn out, broken or fallen by the wayside. So I decided to make the one described by Tim in the magazine. Credit for the design goes to Tim and full details are in the magazine.

Construction

Essentially it comprises:

  • a base 10" x 17" made from 18mm plywood (preferably baltic birch 3/4")
  • a clamp plate 8" x 17" made again from 18mm plywood
  • a hardwood fence, in my case an oak scrap, glued onto the clamp plate
  • 8 off 3/8" captive T nuts
  • 4 off 10mm (3/8") washers
  • 2 off 3/8" star knobs
  • 2 off self adjusting toggle clamps
  • 8 off M5 x 40 long countersunk head socket screws with nuts and washers(or equivalent imperial).


The hardwood fence is glued to the top plate and cut away to clear the star knobs when they are in the forward position.
Drill 2 columns of 4 holes (8 in total) for the T-nuts in the base plate. These start 3-3/8" from the front of the longest edge of the base plate on 15" centres. The remaining  3 pairs of holes are drilled inline with the first two on 1-1/4" centres.
Next counterbore these holes on the underside of the base plate with a Forstner bit to clear the head of the T-nuts. Then the T-Nuts are inserted from the underside and hammered home.

Underside of base plate showing the
counterbores for the heads of the T-nuts

Thursday 31 July 2014

Golden Section or Golden Mean Gauge

I have been reading the excellent book By Hand And Eye by Jim Tolpin and George R. Walker recently.
For those of you how might not have read this yet it "introduces us to the language of pre-industrial artisans" and "how period work is based upon how we relate to our own bodies and the world around us in terms of proportion, ratio and scale". It really is an interesting read and I encourage people to have a look at it.

I was speaking to a friend the other day and she mentioned the "Golden Ratio" and "Fibonacci Numbers"
I know from my time in engineering that when something "looks right" it invariably is right. It turns out that since ancient times people having been making use of the "Golden Ration" to design furniture, bridges, buildings so that they are pleasing to the eye.

Thursday 10 July 2014

Freely available books (Not just woodworking) on the internet

I was tasked by my wife Elly recently to find a copy of Ernest Hemingway's "Farewall to Arms". I saw the Kindle edition on Amazon for a few £s. I then thought as this is a classic it may be free somewhere else.

It is :)

I found the scanned 1929 version on archive.org it was freely available to download on PDF, kindle and many other formats.
Looking around on the site I searched for "woodwork" or "woodworking" and there is a mountain of books in there, both old and new, that are freely available for everyone to download and read. I'm currently reading "Elementary Woodworking" by Edwin Foster a 1903 tome. Everything in there is just as relevant in 2014 as it was in 1903.

Here is a link to the book

Have a look at the archive as it is superb.

Saturday 28 June 2014

My current cross cut sled

The crosscut sled is a very simple but (I believe) essential addition to a table saw. I have made many of these over the years but this is my latest incarnation. It won't be my last.
Essentially it comprises a 3/4" plywood base with two 4" x 2" softwood fences. I won't go into the details of how this is made as there are many tutorials on the internet.

The overall dimensions of the base are 16" wide x 23-1/2" long. The saw kerf slot is at 5" in from one edge. There is only one mahogany runner on the base as European saws with sliding tables only have one mitre slot to the left of the saw blade when viewed from the operator perspective. I don't believe that you actually need to have two runners as they are prone to binding if the mitre slots are not precisely parallel.

You may also notice the piece of blue tape on the fence. This is just to micro adjust the fence so the cut is exactly square. This saves having to mess around with unscrewing the screws underneath and readjusting. That is just a waste of time and tape works just as well if the fence is slightly out of whack.
If I had one improvement to this it would be making the cutoff side slightly deeper probably 12" instead of the stated 5" making the overall sizes of the sled 23" x 23-1/2" long. I find that cutoff pieces fall when the are cut off instead of staying on the sled. You can scale your crosscut sled up or down accordingly but I find (even at the current relatively small size) it works very well and does not take up much storage space.

I also attach sacrificial 1/4" thick ply to the fence as the kerf slot wears (they do) with some double sided tape. When that wears I take it off and attach another or just put another on the existing as currently shown. When the entire sled is worn out just make another.

Single mahogany quarter sawn runner
on the underside

16" wide - note the blue tape micro adjuster

23 1/2" long x 3/4" thick plywood

4x2 softwood jointed fence
either end

Wednesday 18 June 2014

Not one of my stringed instruments

My wife Elly and I recently went to see Pat Metheny and his Unity Band live in concert at Salford's Lowry Theatre. We were lucky enough to get almost front row tickets but were situated 6 feet away from Pat as the position of the seats were right in front of him. I had been following him since 1977 and I have always been a big fan.
The concert started with him playing a derivative of the guitar shown below.

The one he was playing only had two necks but still had 4 separate runs of strings making up 42 strings in total. Elly and I thought he would just strum it and call it done. How wrong we were. He played every part of the instrument including the wood and it blew every-bodies mind in the theatre.

I did a little research and found out that it was made by Linda Manzer a luthier based in Toronto see here. It gives me food for thought (not that I would be able to play it like Pat does) but I could have a go at making something similar.

Hmm a project maybe for the future.

Thursday 12 June 2014

Keepsake box

As I mentioned in a previous post I'm currently working on a keepsake box for my nephew and his soon wife to be. They are marrying in June so I've had to work fast on this one.

The design of the box is roughly following a recent project in the WoodWhisperer Guild where Marc Spagnoulo showed a humidor box being built. I didn't do a direct copy of this but used some of the techniques like veneering and accent with a different wood.

My wife and I also thought it would be good to incorporate some inlaying so we have chosen, with the help of one of Elly's Chinese colleagues, to have some Chinese characters in the design. This is essentially the dual happiness character used at many Chinese weddings. My nephew and his fiancĂ©e are not Chinese by the way.
Chinese double happiness character
The intention was to make the character from mother of pearl and then inlay it into some ebony. The ebony was to be cut to a square shape and then inlayed into the box.
The box itself had to fit a regular magazine that was available on UK bookstore shelves. So the internal dimensions dictated the overall size. The outside dimensions are 370x270x160 high

So here is the finished article in all its glory.
The finished double happiness
in pearl inlayed into ebony

Brusso feet and latch

Sliding till made from mahogany,
inside lined with sapele and felt baize.
Hinges are Brusso quadrant hinges

Book matched oak burr veneer


The entire box is English oak, sapele and mahogany. The veneer on the top is oak burr bookmatched in quarters making up the diamond. This is overlaid over 3/8" mdf that has sapele stabilizing veneer in the inside.
The box is finished inside and out first with two coats of shellac. Onto that is pore sealer that was rubbed out to 320 grit. On top are several (12 I think) spray coats of General Finishes Enduro Var satin (semi gloss). This has been rubbed out finishing off with 0000 grade wire wool and has a nice shine that isn't too glossy.


Monday 9 June 2014

MuscleChuck review

My Trend T11 router is mounted in my router table. Over the years I have received a few skinned knuckles when trying to get the collet tightened or undone. This is due in part to the router having tools that only work under the table. It's just the way it is!
On to the scene came the Musclechuck from De Rosa engineering see here. I bought mine from their European partner Woodrat see here.
A pair of MuscleChucks

The device is a precision made accessory that replaces the collet and nut from your router. There are no cams or internal parts just a split collar with a 1/2" bore and an allen head socket screw. It also comes complete with a teebar allen wrench (4mm in my case).

Friday 16 May 2014

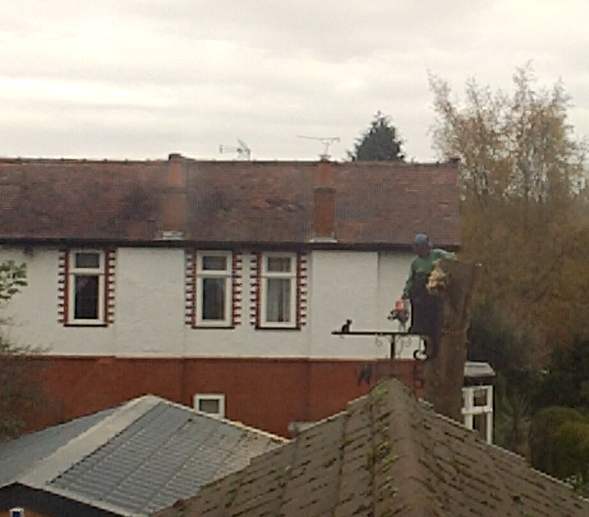
Removing an urban tree

My shop had my neighbours 80 year old ash tree towering over it less than 4 feet away. The tree was around 50 feet high and most of it leant over my side of the wall. Birds roosted in the tree and crapped on my car and driveway. The shop floor is a cast concrete slab and is one of the only remaining parts of the original garage. It is around 12" thick (not sure why so thick) but the previous owner of the house used to keep Ferraris in the garage. Anyway I digress and when I had the shop rebuilt I noticed one or two minor cracks. I also had an inspection pit filled in as that had evidence of tree root damage. Not good when you are under a car getting your eyes poked out by a tree root. The pit had to go and did.

I noticed that the driveway was being uplifted and it was coming from the tree. I notified my neighbour and he was kind enough to apply for planning permission to get approval to remove the tree. The local council came to have a look and the conclusion from them was that the tree was causing "nuisance" which is a legal term. Approval was granted and a tree surgeon was called November 23 and 24 of 2013.

The tree shown near to the shop (Nov 2012)
before the new fancy doors were fitted

The guys got kitted up with climbing gear and set about first of all removing the upper limbs. Then gradually working their way down taking slices across the trunk and dropping the chunks into a skip (dumpster) at it's base.
Climbing up the tree and
removing limbs
The shop is the building with the greeny/blue roof
It took them the best part of two days to remove the tree due to the laborious process involved. There just was very little space for them to drop it by conventional felling. They even came around to my house and cleaned the sawdust from the roof of the shop and pathway. They got seven wheel barrow loads of sawdust from the roof alone.
Next day slicing 3" thick chunks off
the trunk

When the surgeon had finished he said the tree had quite an amount of rot at the base so could have fallen anyway. Only a couple of months earlier the same neighbour had an adjacent tree blow over and block the road.

So now the tree is gone. I didn't manage to get any boards from it, the car can park on the drive without a mass of bird crap coating it and there are no more seeds populating ash weeds everywhere in the garden.

Monday 12 May 2014

Positioning your work bench

Over the years I've had my bench in various locations in the shop:
  • Against the wall under a window
  • Against a wall with no window
  • Bolted to a wall
  • In the middle of the shop
  • Adjacent to a wall near a window with space between the bench and the wall.

I've found that the best place for my bench is the last one, with a gap of around 10" at the back of the bench to the wall, for the following reasons:
  • My tool rack is across the window so I don't want to stretch too far to get tools
  • The bench is heavy enough to stay put without the extra help from a wall when planing for instance
  • The window casts natural light onto the bench
  • Anything that falls off the back of the bench can be easily retrieved
  • I can use the rear apron of the bench to clamp onto. The space gives access to get the clamps in.
The bench is also on a mobile base that can be jacked up so I can pull it out further if need be.
This arrangement works well for me and I've arrived at the solution by trial and error.

Monday 28 April 2014

Veneering experimentation

I have a large amount of veneer that I have accumulated over the years. I have occasionally used my stocks in smallish projects doing edge-banding or fixing flaws. I'm currently working on a keepsake box for my nephew and his fiancée for their forthcoming marriage in June.

I had some sapele veneer in strips about 6 feet long 10" wide and also some oak burr veneer so decided to try flattening the veneer and veneering the top of the box. This is essentially a piece of 9mm MDF cut to the size of the rabbets I had cut in the box upper sections.

I enquired on Woodtalk Online forum if anybody had any recipes for a veneer softener as the commercial softeners are not available here in the UK. The commercial ones in use in the US are SuperSoft 2 Veneer Softener or the other one "Veneer Softener/Tamer". The mailing costs were prohibitively high or there were export restrictions.

Sunday 27 April 2014

Fire Screen to stop little cats going up the chimney

A few days ago I awoke early one morning at around 5AM. I went down stairs to make coffees and sat for a while in my living room watching breakfast TV. I was joined by Anna the cat who is a totally black cat. She sat on my lap awhile and then got off. I heard her mooching around opening cupboard doors and the like. Next minute she appeared standing on the fire (which wasn't lit) staring up the chimney. The next thing I knew she had disappeared up the chimney and bits of soot and brick dust were falling down. Now the fire is gas powered and there isn't a great deal of soot up there but I was dumbfounded. "What do I do if she gets stuck?" - I thought. I had visions of firemen dismantling the brickwork of the chimney to get her out. Fortunately she emerged a few minutes later none the worse for her experience. I had noticed in the past that there were occasional black foot prints on the carpet so it must have been a regular thing for her.

Thursday 24 April 2014

Sketchup 14 tiny review

I'm been a user of Sketchup for years and I've been testing the Pro version of Sketchup 14 for the 8 hour evaluation period and have found it very good. The additional features of Sketchup Layout are fantastic if you are a professional user and have to get working drawings out to clients. I'm not a professional engineer anymore, having left that profession using AutoCad many years ago, so don't need the feature.

New to this version is a template especially for woodworkers either in inches or millimetres. This was previously called Product Design Woodworking in V13 but has now become a template in its own right. They have also made vast improvements to the Extension Warehouse. One extension I always install is called Layer Manager by D.Bur. This is a superb tool if you are familiar with the concept of layers.

The 3D modelling extras in the Pro version are useful but not essential in a woodworking design environment. For instance if you want to project a radius all the way around a surface (producing a representation of  a roundover like the lid on this box)

you can do it quite easily using Intersect Faces command. You then have to erase all the extraneous lines produced manually. The Solid Tools command does all of this for you but it costs $$$ (or £££ if you are English like me) for the privilege. I, as a weekend warrior garage woodworker, am happy to do this by hand so it's no big deal.