There were quite a few in my price range:
- Jet 10-20 Plus Drum Sander £941.30
- Axminster Trade ST-480 Drum/Brush Sander £1,739.50
- Powermatic PM2244 Drum Sander £2,269.50
- Jet JWDS 1632 Drum Sander £1,310.98
However I dismissed the more expensive Axminster and Powermatic sanders as they were much too big for my modest 410 square feet shop. This left the two Jet machines as contenders.
Most of the work I do needs the larger capacity of 32" and some guitars I make are less than 16" width so can be run straight the the sander in one pass. I dismissed the older and smaller Jet 10-20. This left the excellent JWDS 1632 which has been recently redesigned.
The new features are the easy tool-less abrasive retaining clips. This make changing belts an absolute breeze.
The other new features are the conveyor drive motor now pulls the workpiece through the machine, rather than the previous push method. This is supposed to give a much better finish.
Sandsmart™ control continuously monitors the sanding load and automatically reduces the speed of the conveyor if the load becomes too high.
Conveyor bed parallelism is adjusted by turning a simple dial exactly like the much praised Powermatic PM2244. This alone is well worth the outlay to buy this excellent machine.So I ordered one and added the extra infeed/outfeed tables and the castors. As my shop is relatively small I need to have the ability to move every machine around.

The sander arrived the morning after I ordered it with free shipping from Axminster Tools overnight - astonishing! The shipment comprised 3 boxes on a pallet one of them very heavy.
Stand Assembly
The first thing to do was to unpack the box containing the stand. This is a very substantial folded steel structure which is made from 0.1" (2.54mm) thick heavy gauge steel. This has been powder coated with a white finish. The nuts and coach bolts are made from high tensile steel. All very promising so far. |
| Stand components |
The instructions in the manual are very easy to understand and assembly of the stand on my assembly table took about 30 minutes. The only thing to watch was to make sure the stand has a few components which require holes lining up with each other making up the top of the stand. I used a couple of 3/8" drill shanks to ensure the machine would mount properly.
 |
| Aligning holes using drill shanks |
 |
| Stand assembled in sub assemblies |
The casters were then installed. It is not necessary to have a thin wrench to hold the fixed portion of the caster shaft as you can get enough grip with your fingers on the circular cup part of the caster.
 |
| 4 expensive high quality caster came in the box |
 |
| Tighten the caster with a ring wrench while holding the cupped part of the shaft. |
 |
| The finished stand |
Mounting the machine to the stand.
 |
| Cardboard packaging removed from the machine The plywood sheets are secured to the underside of the machine with cap head screws. |
The machine is very heavy and can't really be lifted by one person so either get a helper or use and engine lifting hoist to lift it out of the box. I got a helper to assist me and we lifted the machine onto the stand temporarily at 90 degrees to its fixed position. This is so the plywood boards can be removed from the bottom of the machine along with the plastic bag the machine is wrapped in.
Then the machine was turned through 90 degrees to its final position. There are 4 holes with welded captive nuts on the underside of the machine which align with the holes in the stand. Then the 4 cap head screws that held the plywood on are inserted, tightened and the assembly is complete.
All that is left to do is mount the winding handle onto the vertical shaft protruding from the top of the machine.
 The handle is secured to the shaft with an integral socket grub screw.

 |
| Finished initial assembly |
The handle was then wound to open the mouth and there was a small transportation spacer to discard.
Mounting the infeed/outfeed tables
I had purchased the extra infeed/outfeed tables which effectively double the support area of the machine. These are mounted to the machine using 4 brackets and some more cap head allen screws.
It is essential that the tables are mounted slightly below the level of the conveyor.
I use a 1 metre long steel rule on the conveyor surface. This is gently clamped to the conveyor simply by winding the stationary sanding drum onto the rule.
Then I used a thin steel rule as a spacer to adjust the infeed table (on its slotted holes) to give the desired clearance. This procedure is repeated for the other side of the infeed table. Then the same procedure is repeated on the outfeed table.
 |
| Adjusting the outfeed table |
Control panel
After plugging the power cord into a UK 13 Amp 230 volts socket I tested the machine for power. There are a pair of push buttons one green and the other red which are self explanatory. The green turns on power and the red turns it off.
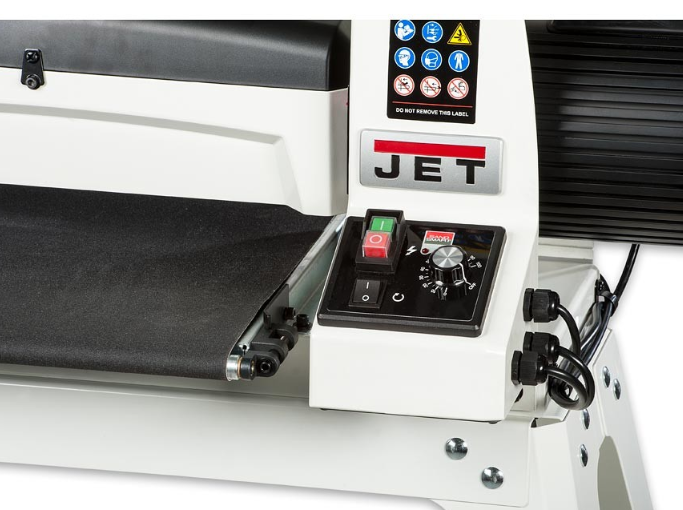 |
| Control panel |
The other controls are a rocker switch which turns on the power to the sanding roller.
The remaining rotary control is used to set the speed of the conveyor and is marked in percent 0-100
All worked fine.
UK Specification
- Abrasive Roll Width 76 mm (3")
- Dust Extraction Outlet 100 mm (4")
- Feed Speed 0 to 3 m/min continuously variable (0 to 9.8 feet/min)
- Model JDS 1632
- Nett Weight 71 kg (156 pounds)
- Overall L x W x H 1,007 mm x 508 mm x 1,269 mm (39.6" x 20" x 50")
- Power 1.1 kW
- Rating Trade
- Sanding Drum Diameter 127 mm (5")
- Sanding Thickness Min\Max 0.8 mm to 75 mm (0.031" to 3")
- Sanding Width Double Pass 812 mm (32")
- Sanding Width Single Pass 406 mm (16")
- Table Size 456 mm x 420 mm (18" x 16.5")
- Voltage 230 V
Initial testing and adjustments.
The first thing to do was connect a 4" flexible hose connected to my dust extractor to the top mounted 4" port.
I started with a planed 12" length of oak that still had planer ripple marks in. While the machine was stationery I wound the depth handle until the sanding roller just touched the board then I backed the sanding roller off a hair. Then I removed the board and started up the machine. As I hadn't used it before I set the conveyor speed at 50 and switched on the drum motor.
Then the oak board was placed onto the conveyor and it pulled the board through the machine. All worked ok but as the drum was retracted slightly no sanding took place.
I would the handle down a quarter turn and fed the board through again. Sanding took place and I was surprised just how quiet the machine is. No ear defenders needed. Another quarter turn and another pass resulted in total removal of planing ripple. The machine is supplied with 80 grit paper.
I then turned the board over and did the same on the other side. The finish obtained was suitable for running an orbital sander over.
 |
| Sanded board |
You can of coarse buy different grits and the quick change spring clips facilitate quick grit changeover.
I had bought a couple of rolls of Abranet 3" x 25metre long abrasive, 1 roll in 80 grit the other in 120 grit. Removal of the original abrasive was super quick.
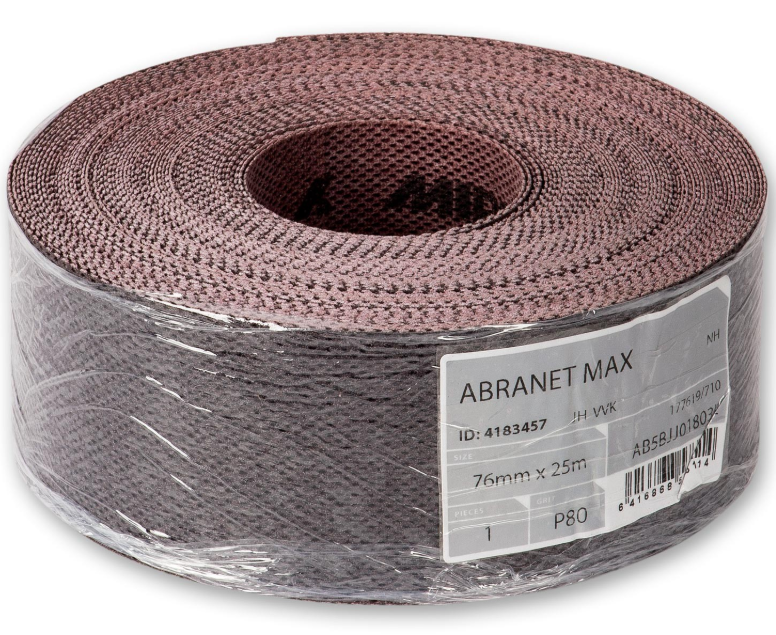 |
| Abranet abrasive belt |
The length of the original Jet supplied abrasive is roughly 2.3 metres which is just less than 8 feet. I decided to make up a template to cut my own abrasive. I used a sheet of 8 x 4 ply and cut off a 5 " width 8 feet long.
I then placed the original abrasive onto the board and held it down with spring clamps. Then using a Sharpie I marked the cut length and the end shapes onto the plywood. Then it was a simple matter of laying the new abrasive onto the plywood and using a box cutter cutting it to length and the end shaping.
Installation onto the machine is really easy using the integral spring clips on the roller winding the abrasive in a tight spiral ensuring that there is no overlap anywhere. The only thing I found was that the abrasive wore out my box cutter very quickly! It is abrasive after all.
Results
I ran through a board wider than the 16" width to test drum parallelism and found that out of the factory is was spot on. There was no discernible ridge when the board was rotated through 180 degrees and run through again on the same thickness setting.
If there was any adjustment needed then there is an adjuster on the open cantilever end and it looks super simple to adjust.
 |
| Conveyor parallelism adjuster |
Dust collection was excellent and left only a tiny amount of dust on the conveyor. You do need an extractor with decent extraction flow rate though.
Conclusion.
This is an excellent addition to a small workshop and as the machine is trade rated should be able to run long hours every day without issue. The addition of the parallelism adjustment was a deal winner for me. There are no other machines at this price point with this excellent adjuster currently on sale in the UK. The nearest thing is the Powermatic PM2244 which is a considerable larger machine with a hefty price tag.
The machine is extremely well made out of substantial materials and comes with Jet's 3 year warranty. It should last me a long time.
Now I'm off to the shop to play with it.