Showing posts with label Shop. Show all posts

Tuesday, 20 February 2018

Dewalt DW738 - replacing the drive wheel and upper wheel

Unfortunately the rubber tyres on this bandsaw are not capable of being replaced and the wear on the upper wheel after nearly 10 years is considerable. Spare parts are still available (2018) for this machine so I decided to buy a new set of wheels to prolong the life of the bandsaw.

The wheels come as a full assembly complete with bearings, new rubber tyres and are a simply bolt off bolt on arrangement. I also bought a new set of rubbing bearings as the old ones had considerable wear.

The procedure to do this is:

  • Open the access door
  • vacuum any residue from previous operations.
  • Remove the table
  • Remove the blade after loosening the upper wheel tensioner


I also removed the upper rack and pinion assembly complete with bearing assembly. While I was at it I removed the lower bearing assembly.

Slacken the motor

Monday, 12 February 2018

Dewalt DW738 Bandsaw Review

I've had this bandsaw now for nearly 10 years and thought it's about time to review it.
Essentially this is a 13" bandsaw (nominally 12") and has a resaw capacity of 155 mm or 6".
The version I have is a 2 speed saw with the speed changed by moving the drive belt onto different pulleys. When supplied from the factory it is in low speed mode and I didn't move that setting until early on in 2014. Then it was found that it ran much too fast for the type of work I use it for. So I moved it back to the slow speed. It is more trouble than it is worth to change it.
Assembled Dewalt DW738 Bandsaw

There is another saw with a continuously adjustable speed setting and it is designated the DW739. That saw is not reviewed here but probably is similar in specification and operation.

Unlike a lot of good Dewalt equipment it should be a different colour. Like Bosch DIY green against Pro blue. Dewalt DIY stuff needs to be brown instead of corporate professional yellow. It is definitely hobby DIY level but has served me well for the last 10 years.

Monday, 15 January 2018

Drill Press Upgrade - Part 1 Design Process

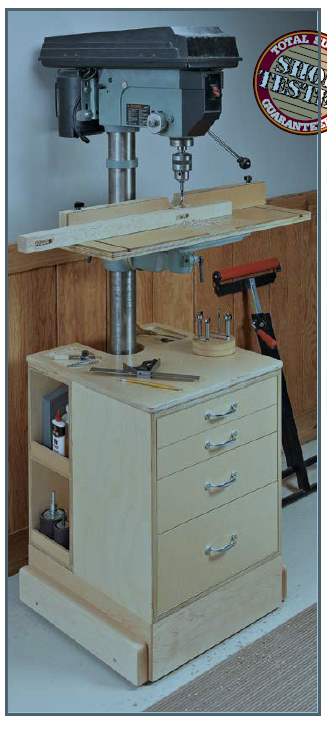
For years I have persevered with my floor mounted drill press. I had fastened this to the concrete floor in the shop with anchor bolts but the position of it wasn't ideal. Obviously a home workshop is in a constant state of flux and is constantly evolving so my initial thoughts on where it should be sited have now changed. When you find a need for a change to your particular workflow if there is something bolted down it can limit your plans.
This project is intended to give me more flexibility in the location of the drill press in my shop.
Also I want to have extra drawer storage space so I designed this into the project.

The main criteria was:

  • Ability to move the drill press
  • A stabilized base
  • Storage space local to the drill press


So I looked around for potential plans and found one from Woodsmith.
It seemed to fill all my requirements so I adapted the plans to suit my particular drill press.


The thing I liked about the plans were the mobile base with a low centre of gravity and a nesting storage unit. This is also on wheels and can be pulled out so allowing the drill press full height to be used if necessary. I don't have a requirement to wheel the press all around the shop as if on a shopping cart with rotating castors so the fixed axis wheels are fine for my needs.
Also I conventional metal mobile base would not suit my particular requirements so was discounted completely.

So here is my Sketchup representation of the entire mobile base/storage unit shown as exploded and nested.

This shows the storage unit nesting around the mobile base.
I used a 3D model of a Delta drill Press that I found on the
Skecthup 3D Warehouse. It was close enough dimensionally to my
drillpress.

This shows how the storage unit can be pulled out on
its integral wheels (hidden by the side plate)
should the need to use the full capacity of the drill press be required.
The drill press mobile base also has screw jacks to further stabilise the
whole of the floor stand.

This is an exploded view of the storage unit.
4 drawers and 4 storage cubbies give further storage space
to a crowded small shop.

I decided to make the entire unit from birch plywood and some construction timber. The edges of the drawer fronts and storage unit top were to be edge banded with hardwood.

Full extension 10" (250mm) stainless steel slideways for the drawers, 8 x 3" diameter no mar wheels and 4 jacking screws with non slip pads make up the hardware for the entire project.

Also as much as possible glued and pocket screws construction is used. Pocket screws can be immensely strong, especially for shop furniture, and I believe get a bad press. I have made loads of sheet good based projects with pockets screws and find them very strong.  Maybe the advent of the Festool Domino has created this perception, I don't want to start a debate on this (you are free to start another thread if you desire) but I don't currently have one so pocket screws it is.

Tuesday, 16 May 2017

Tracksaw setting gauge

For all you users of tracksaws (Festool, Bosch, Makita etc) here is a design of a measuring gauge to make setting cuts far easier.

The one problem with cutting sheetgoods using a tracksaw is measuring. You create a good edge from stock by cutting about 1/8" off. Then using a tape measure and a pencil make a couple of pencil marks relative to this edge.
Then you set the tracksaw track onto the pencil marks and suddenly you can't see them. You move the track a little to expose the pencil line. Go to the other end and find that pencil line is 1/8" away from the rubber splinter guard. You move it back to the line, goto the other end and find you have obscured the pencil again.

This scenario does happen and sometimes you end up with a board cut that is slightly out of parallel and oversize because you covered the pencil line. There must be an easier way of setting this.
The good news is there is.

Steve Maskery of Workshop Essentials designed a simple setting gauge with integral rule that compensates for the track width and results in parallel, accurate width, repeatable cuts every time.
I take no credit for designing this but set about making one.
(Steve also says this has probably been done many times before in the dim and distant past but he was the first person to show it being created on video.)

Here is my Sketchup version of Steve's original design
Tracksaw Gauge Head


Stock

First of all I found a length of hardwood on my shelves around 1.2m (48") long. I milled this square to about 20mm (approx 3/4"). It is not essential that this is dead straight over its length and a slight about of bow is acceptable. If you can make it straight and it maintains then all the better.
Cut both ends square.
Relieve the arris on each side of the stock to remove any sharp edges and splinters.

Head fabrication

Next the head was made from a length of walnut cut to 20 x 30 x 90 mm (3/4" x 1-1/4" x 3-1/2").
I cut 2 blocks 20 x 30 x 35mm long (3/4" x 1-1/4" x 1-3/8") from walnut. Into one of these I drilled and tapped a hole for M6 (1/4" threads can be used in US). I also counterbored one end 12mm diameter x 10mm deep (1/2" x 3/8").

The walnut blocks were then glued on with a 20mm division to form a U section. I used the actual hardwood bar to space the blocks. There can be a slight amount of clearance here of about 10 thousands to allow the bar to slide easily back and forth. I further dowelled these blocks into place.

Graticule plate

Next an acrylic graticule was made from some 6mm (1/4") perspex or plexiglass I had in stock. It measures 30 x 90 x 6mm (1-1/4" x 3-1/2" x 1/4" thick) I scratched a line on the backside and highlighted it with a Sharpy to make it standout. Then I drilled 4 small holes, 1 in each corner, and countersunk them on the opposite face to the scratched line.

Then using small countersunk screws the transparent graticule plate was attached, line side down, across the blocks. All corners were then chamfered on my disc sander. I decided to radius 2 corners as a visual reminder as to which way around the reference face goes.

Assembly

Use a finger screw or machine bolt if you don't have one and insert it into the threaded hole. I found a plastic rod of suitable diameter and cut it to 8mm (5/16") long. This is the pressure washer to prevent marring the stock in use.


Then insert the stock and set it to a random length.

Calibration
The final part is calibrating the gauge. At this stage there is no scale on the gauge.

Take a random sheet from your racks and set it flat on your cutting bench. Cut one edge with your tracksaw to establish a straight edge. Then move the track over to the other edge of the board. Take your gauge and set the head to register on the straight edge, extend the stock until it touches the back edge of the track and lock the head in position.
Move the gauge to the other end of the track and ensure the track also is located correctly. 


Move the gauge back to the original location to ensure it hasn't moved.
 If you have track clamps lock them into place. The rubber strips on the underside of the track hold it into place 99% of the time but there is the odd time where you can knock it yourself.

Then make the cut with your tracksaw. Note that you have NOT measured anything whatsoever yet.


Remove the track saw and track.
Next using your most accurate steel rule take a measurement of the width of the board you have just cut. Make a note of this.

Applying the measuring tape.

You can buy self adhesive metal measuring tape that is intended just for this purpose. I bought one which came on a roll starting at 0mm and ending at 1000mm (0-39" approx). The ends of the tape have a large un-etched section intended for trimming to any size you wish. I bought one that works from right to left. You can also buy them that start from left and increase as you get to the right as shown below.


The tape is thin enough to slide underneath the graticule plate and between the face of the stock. Slide it into place and set it so the measurement you took is under the scratch line. Then using a few strips of blue tape temporarily stick the tape into place so it can't move. Remove the head.

Next cut the tape with tin shears to be shy of the end face. Now remove a small portion of the backing release paper and start sticking the tape down to the stock. Pull out the backing paper at 90 degrees to the tape whilst smoothing the tape as you go along. When you reach the first bit of blue tape remove it before carrying on. Do this until the entire tape is stuck down.

Using the tin shears again cut off the end that it surplus.

You will then have a gauge that starts at 127mm (5") or whatever the width of your track is.

Gauge head with measuring tape applied

My completed full length gauge


Reassemble the head into place and make a test cut this time setting the gauge to a determined length.

Measure the resultant board width and you will find it is spot on. If it isn't you can slot the holes in the graticule plate and move the scratch line slightly.

Improvements

You can put a brass threaded bush in the hole if you like but I haven't found it necessary


Friday, 21 April 2017

Saw Till Part 5

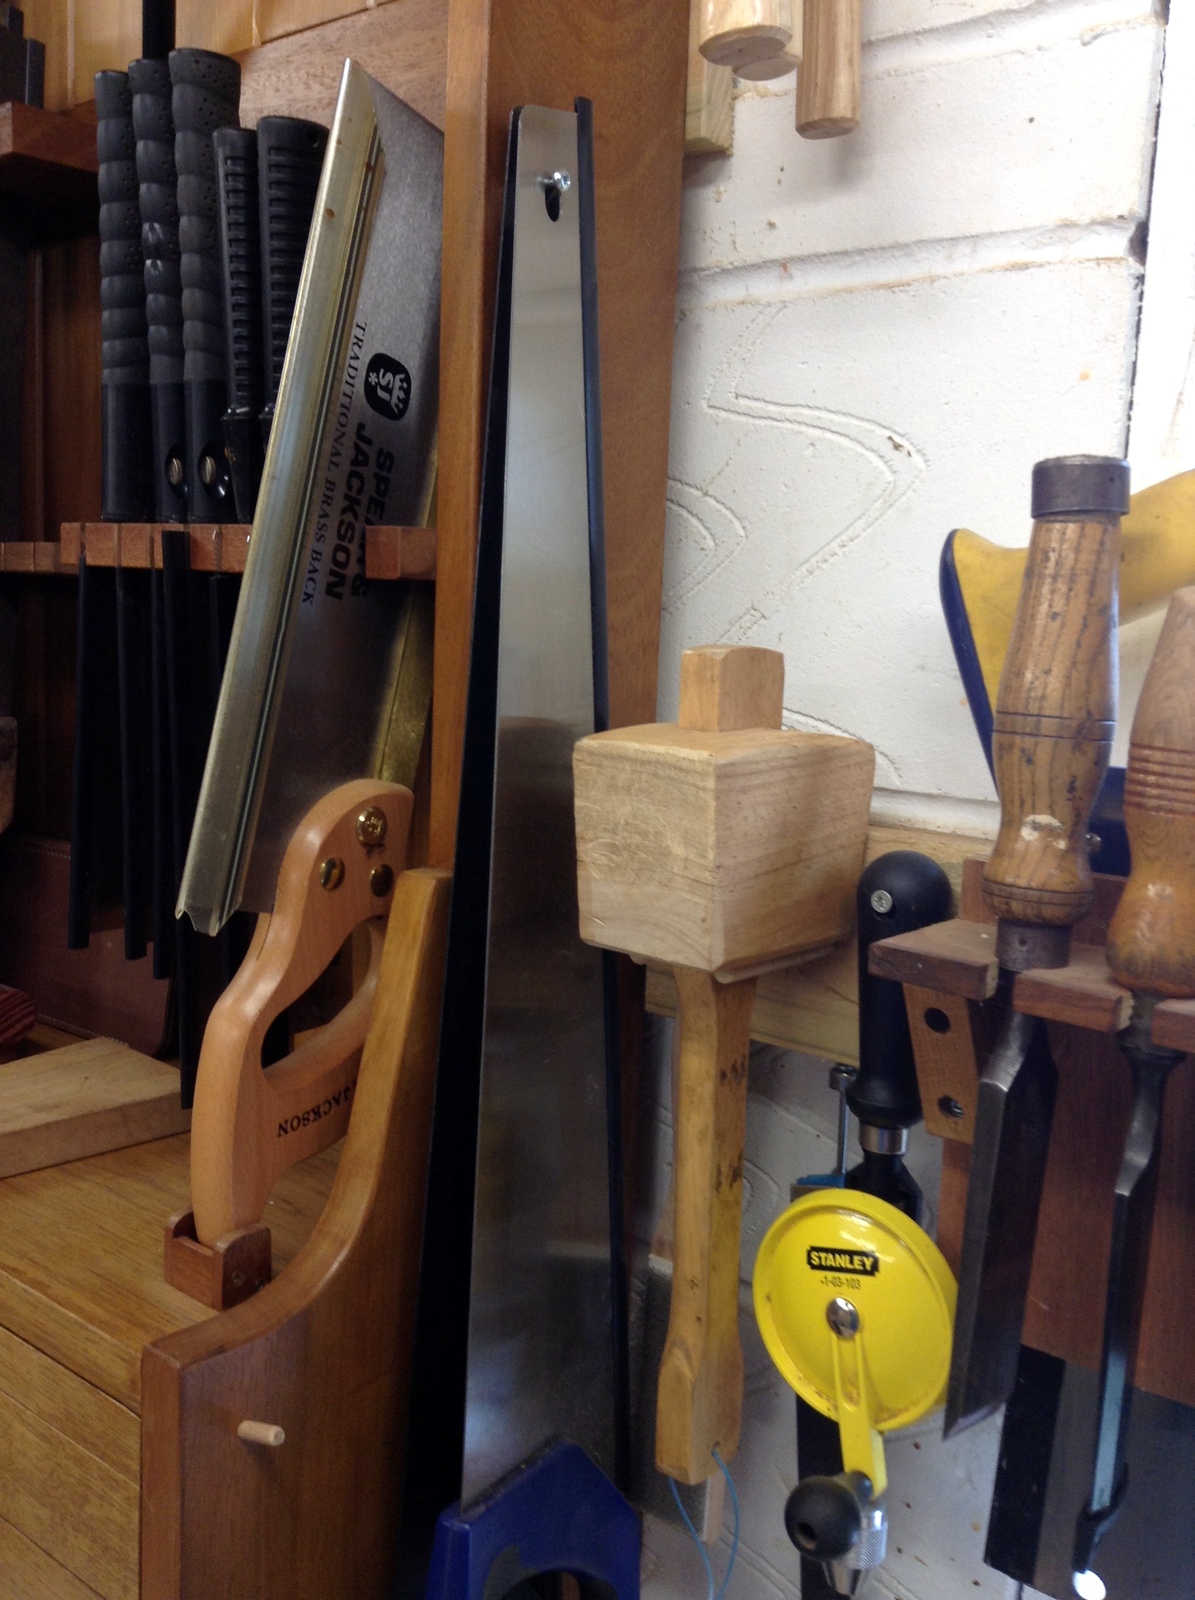
Less frequently used tools like the 3 saw files are stored behind the pull saws. There is enough room above to extract the files vertically.

Saw files simply in holes in the pull saw holder
Completion approaches with the construction of 6 drawers. There are 2 deep drawers, 2 mid sized drawers and 2 tray sized drawers. All are constructed from oak with dovetailed joints. The front panel is 19mm (3/4") thick and the drawer sides are 12mm (1/2") thick.
I used half blind dovetails in the front panel and conventional through dovetails on the other joints.

Chopping dovetails (my favourite activity in the shop) with cool jazz in the background
A finished tail board

A few unfinished drawers in situ


The bottom panels are made from 3mm (1/8") baltic birch plywood. I have a supplier (Daisymoon Designs Ltd) of this excellent material. It comes in a pack of 10 with laser cut dimensions of 300mm x 600mm (1' x 2') and is intended for model making. The only thing is you do need to keep a weight on the opened pack as it will take up moisture from the shop atmosphere after opening the shrink wrapped seal. It can cup or potato chip but soon stabilises.

After the drawers were glued up and sanded flush they were finished with a few coats of General Finishes Exterior 450. Also all of the support components were coated with finish.

A set of brass knobs were fitted to the drawers and they were fitted into place. I opted to use shop made wooden slideways. These mate with the slots in the drawer sides.

Wooden drawer runners. These are quartersawn white oak scraps.

Corresponding grooves in the side of each of the thinnest and medium drawers
I also had a few more tools to fit onto the outside of the till so I fabricated a few brackets.
This simple bracket made from a scrap and two long dowels holds...
a few tools, large deadblow, fretsaw, rafter square and my framesaw.
A Warrington pattern hammer holder.
You can never have enough hammers.
A stainless steel screw ensures that hardpoint panel saws are also to hand.
An essential place for a beverage holder is formed by the right hand tray
A cup holder

Finished saw till
The till was then filled with a few tools and it was complete.


  • Carcase timber: Iroko
  • Back panel: Western red cedar
  • Drawers and intermediate top: French oak
  • Tool carriers: Mahogany
  • Finish: Sansin SDF
  • Drawer pulls: Armac Martin Polished Brass Furniture Sash Knob 2124P/B


I hope this inspires you to get your shop organised and make sure there is a place for everything and everything in its place. Thanks for looking.

Tuesday, 14 March 2017

Flickering T8 Shop Lighting

I have a decent amount of light in my shop due to good placement of twin tube 5 foot T8 lighting fixtures. I had these installed when I remodelled the shop from ground up back in 2012.
Here is a plan view of the current shop layout in 2017.
The T8 lighting layout can clearly be seen in the plan view of the shop.


The lights have been great in that time with only one tube needing to be replaced.
Late last year 2016 I did notice that one fixture was flickering but it was out of eye level most of the time so didn't cause me too much of an issue.

During a winter build I broke out the router table and positioned it close to my dust extraction. This also but the flickering light in eye view. It was irritating so I changed the tubes. That made no difference so meant the ballast was faulty.

I looked up the part number and it was a Chinese made ballast which could be bought from Amazon. However there was a vast shipping cost so I went with one made by PRO LEC that was on Amazon for £14.36 GBP including free UK delivery. If you are interested search for BALLAST ELECTRONIC T8 2 X 58W GD-T8258C2 By PRO ELEC.

BALLAST ELECTRONIC T8 2 X 58W GD-T8258C2 By PRO ELEC.

Went it arrived I carefully pulled the connections out of the old ballast and pushed them into the new ballast observing the connection diagrams. No tools are needed with these push in connectors. The only thing I needed was a nut spinner to remove the mounting hardware. The new ballast fitted the same screw holes and was fitted into place. Then the fixture was rehung on the chains and connected to the power.

When I reset the lighting circuit breaker and switched on the lights it lit first time with no flicker and was bright. The other lighting fixtures were dull though. Then I noticed a fine layer of sawdust on each tube. I then spent aboput 30 minutes taking down each tube, wiping with a glass cleaner and replacing. The results were spectacular. I now have full brightness restored to the shop.

It just goes to show that the fine sawdust particles settle everywhere including on lamps. Take the time at least once a year to clean your lighting tubes to maintain lighting levels in your shop.

Thursday, 2 February 2017

Saw Till Part 3

Most of the sanding to 180 grit was done prior to glue-up. It can be difficult running a ROS over boards and getting into internal corners without leaving a groove from the sanding disk. Then after the glue had cured the saw till was removed from clamps and sanded back to 220 grit where required.
French cleat and spacer cleat added

A French cleat was made from some construction timber being glued and screwed to the rear uprights. Also a spacer cleat was glued and screwed to the lower part of the the rear. This is to compensate for the thickness of the French cleat and is made for the same thickness timber. If you are not sure what a French cleat is there is a description of how to do it from this URL. Also have a search of the WoodTalk forum as it is mentioned numerous times.

I had some Sansin wood finish which had an integral stain within left over from a previous job. I applied just one coat of the finish to give all components of the saw till an all over consistency. Iroko and cedar are similar on color but the French oak is slightly lighter. The stain gives it a uniform color without affecting the grain appearance. A couple of top coats of General Finishes Enduro Var gives the till extra protection. This is only shop furniture but it you are making it you may as well make it well.
Saw till lifted onto the wall cleat (don't look at the inside of the drawer boxes as the finishing in this view isn't good - nothing to see here move along!). The rear tongue and groove panels are not glued and are free to float about in their respective grooves with seasonal humidity variations. You can also see a shop built table saw blade holder adjacent to the till.


The till was hung on to the pre-existing French cleat on the shop wall and left to cure for a few days before kitting out began.

As you can see there is not much to making a saw till carcass, use of simple mortise and tenon joints, a few dovetails, a few dadoes and grooves. Everything can be done with handtools, machine tools or, more likely as in my case, a combination of both but add your own decorative touches to it if you want. For instance you could run an ogee profile all around the front edges or practice a reeding inlay. It is only shop furniture so might be a good platform to practice a technique.

We are not finished yet as there are a few holders to build. Oh and a few drawers.

Thursday, 19 January 2017

Saw Till Part 1

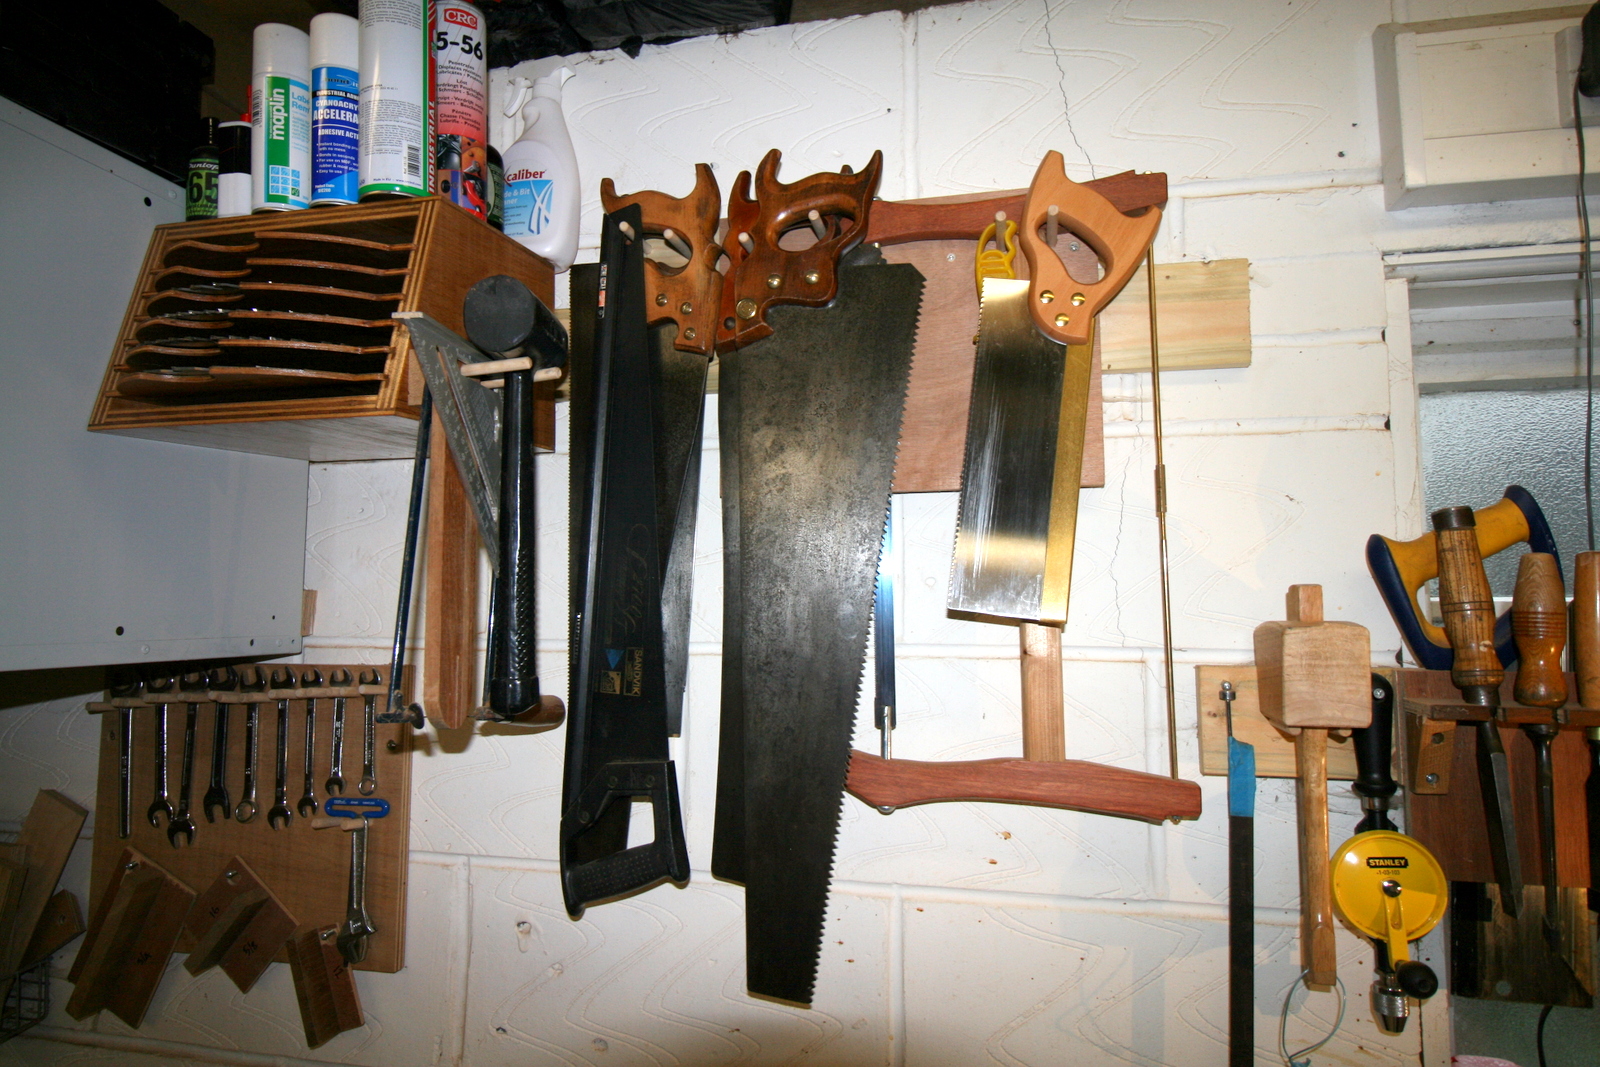
The New Year of 2017 gets underway at TMC Woodworks with something I have been threatening to make for a while. I have a large collection of hand saws and currently don't have a neat way of storing them. They are just hung on a few pegs on a board which is in turn hanging on a French cleat.


I need to change this arrangement

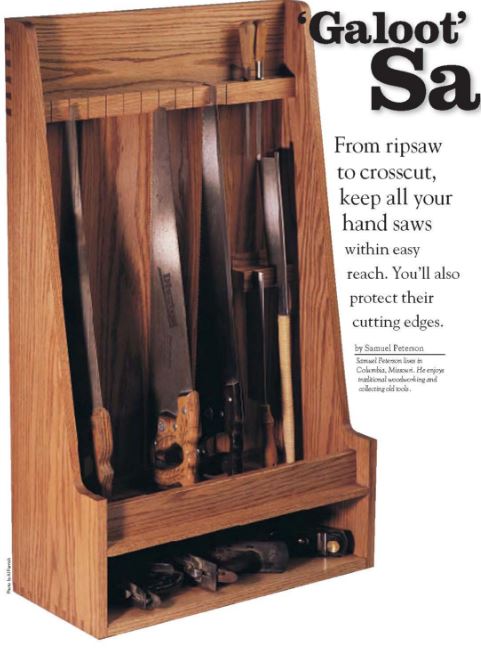
I saw a free set of plans for a Galoot Saw Till from Popular Woodworking which seemed ideal so I adapted the plans for my needs. Mine roughly follows the size and shape but instead of an open space at the bottom I installed two drawers instead. I also dispensed with the multiple sections making up the rear panel. There was a design flaw in the way that the upper crossmember was installed. The original had used dovetails. The pins in the side boards had been cut so they presented the direction of the grain to the crossmember. This is inherently weak as the pins could just shear along the grain line. I decided to use mortise and tenon joinery for this component instead.

The top left of this image shows what I mean, The pins in this configuration add little or no strength as they are cut with the grain direction. If you were to hang this from the crossmember it could fail if subject to loading.
Here is my version of the sawtill


The sides of the original could be made from a single long board if you take care when cutting the profile. Unfortunately I didn't have sufficient stock on the shelves in the shop to make it as designed and I only wanted to use what I had. So like a good woodworker I compromised with what I had. I found a couple of pieces of western red cedar left over from a project so glued up a fabrication to gain enough stock. As I started just before New Year 2017 it was cold in the shop and when one of the glue ups came out of the clamps it sprung apart at the joint line. Essentially the yellow glue hadn't cured due to the low temperature. I also found that the cedar was awful to cut dovetails. It simply does not have sufficient resistance to deformity. When cutting dovetails by hand with saw and chisel the stock does need to be able to resist some pressure when chiselling. Cedar is too soft and I had wasted a couple of days on this. A new years break, work and some theatre work then got in the way of anymore shoptime for a few weeks

So back to the drawing board mid January I found some iroko and oak on the shelves so remade the fabrications again this time using West System epoxy. Obviously the sawtill would be a lot heavier now as iroko and oak are very dense in comparison to cedar. The first job was to mill the rough boards, make a glue up to get enough stock and when cured cut the side panels to shape. I cut the sides whilst they we stuck together with double sided tape.


I am a tails first person when it comes to cutting dovetails so I set about making the tailboards first. The side panels only needed tails at the bottom to hold the lower panel in place.

Monday, 16 January 2017

Current hand tool storage

Here is an update on the current over bench hand tool storage arrangement in the shop (January 2017)
Now using the outside of the cabinet to store twist drills and bradpoint drills
Door open showing the inner door in closed state

Inner door swung open to reveal planes and other tools

Tool rack over the window

I need a proper sawtill. That is a coincidence as I'm currently building one! See later blog posts.


Tuesday, 23 February 2016

Filters changed - Record Power AC400


The Record Power AC400 air cleaner needed a new set of filters having not been replaced since being purchased back in Sept 2012 (nearly 4 years ago!). To be fair I did actually vacuum the external filters from time to time. I bought the replacements from Yandle and Sons:-

  • Record Power Replacement Outer Paper Filter for AC400 Air Cleaner (RPOSAC400-27) £9.99
  • Record Power Replacement Inner Filter for AC400 Air Cleaner (RPOSAC400-26) £15.59

Shipping had to be added on.

The method of replacement was simple. Two spring clips hold the external filter in place. The internal filter bag assembly is a snug fit within the casing. I took them out and vacuumed inside. There was a little dust that had got through.

I replaced the internal filter and sealed around the perimeter with duct tape. Then I inserted the external filter and sealed the perimeter of that with duct tape too.

The filter was then hung back into position by its chains and all was OK. The fresh air flow was increased and clean air was then back in the shop. 

Monday, 22 February 2016

Non shop made storage

I need to make furniture and musical instruments rather than shop furniture. Having said that I will be making a Roubo workbench soon.

In the August of 2015 I bought a storage cube to store all my safety equipment. The main item was the Trend AirShield Pro which was ironically collecting dust in the shop. I mounted it straight to the wall and built a raised platform internally for the AirShield. I also put a few long screws into existing holes in the cabinet and hung ear defenders, close up magnifier and other items. I store both Veritas MKII honing guides and all their attachments in there too. The charging cable for the Airshield runs through one of the holes in the cabinet.

Then there are the edge guides for the routers. Have you noticed that once you have replaced a router back into its blow moulded case there is difficulty inserting the edge guide? I think the manufacturers build in an internal shrinking mechanism once you have initially opened the case. Nothing ever goes back in - we don't have Festool Systainers in this shop! So the edge guides are also in the storage cube.
Then there are the face shields for turning.

So this storage cabinet has become primarily my safety gear cabinet.

I was that impressed with the cabinet that I bought another this time with an integral shelf.
Into this cabinet I have put all my moulding planes/hollows/rounds. That gets them out of the cardboard box which I had stored on the ground under the assembly table.


Both cabinets are now mounted onto the French cleat I had mounted on the wall recently. I also hung the table saw blade storage box and made a temporary hanging place for my saws.
In time I will replace this with a custom saw till.

So I have gone full circle. I initially said I need to make furniture and musical instruments. Instead I am making shop furniture - just what I don't want to do (!) - to help store my tools.
The storage cubes are from CS Storage Limited www.csstorage.co.uk and are model "Armour Cube Locker 450H 450W 450D "


A wall full of tools


Sunday, 31 January 2016

RUST!!!

I went into the shop this morning to start a day of work. I opened my plane cabinet and noticed a shoulder plane with rust on it. When I looked closer it was covered in rust despite me always oiling them (or thinking I do!) when I put them away. Then looking at all the other planes they too had a thin layer of rust albeit a little less severe on them. So out came the sandpaper, WD40 and Boeshield T9. Two hours later they were back to normal.

It appears that over the last few days humidity and external temperatures had deviated quite a lot in England. I remember going into the shop at the start of the week, opening the plane cabinet and seeing my breath inside. The shop heating was on but wasn't at full temperature. I thought nothing of it at the time and all tools were fine. The plane cabinet is fairly airtight but me opening the cabinet let in the moist air from the shop and the resulting formation of rust over the next couple of days ate at the tools while I was out of the shop.

I have some silica gel packets that are in all closed compartments/drawers in the shop but they needed recharging (been in a year or so). I put them in the oven for 30 minutes at about 100C (212F) and have put a bunch back into the cabinet.

Ironically of all the tools like chisels, saws etc. that I have in a open tool rack exposed to the air of the shop, none of them have rusted at all! So much for a "protective" tool cabinet!

So just to underline - Please DO oil any steel tools or cast iron before putting them away.

Monday, 25 January 2016

Veritas Bar Gauge Heads - Review

This is a simple but well made idea. In the past I have strapped a couple of lengths of thin scrap together to make what is essentially a variable length comparator stick. I would normally use a little blue tape to hold the two sticks together. This is cheap and works really well but Veritas came up with this simple idea a few years ago.
Each head is a circular billet of aluminium with a rectangular hole machined in the side. This part has been black anodised. There is a turned brass knob in the top of one of the clamps. Both heads are secured to their respective timbers with brass machine screws.


Like most items from Lee Valley Veritas the item is very well engineered and finished. They simply clamp two pieces of wood 3/4" wide x 1/4" thick against each other. The below photos are from pictures available on the internet (my camera is away for repair!)


In practice you make two 1/4" thick x 3/4" wide sections of wood whatever length you want. Cut a point on one end of each piece. Then slide the pieces into two of the clamp heads and tighten both screws. Each point should face away from each other. Then to use you simply loosen the screws and slide the wooden lengths so they fit inside what you are measuring. It is great for comparing across corners of a drawer, casework, cabinetry etc to square for squareness.

Also you drill an 1/8" diameter hole about 1" from the stub end of one and the pointed end of another. In the holes you simply screw some brass threaded pins (supplied) and you can cover all internal dimensions from about 1/2" to just slightly less than the length of the gauge.
So the gauge essentially has a capacity from 1/2" to the extended length of the bar. Very impressive and a very simple, effective solution.

View showing clamp heads

Using the threaded pins

What is in the box


I made mine from a few pieces of scrap beech and oak I had lying around in the shop. I made two sizes, 1 pair at 19" long. 1 pair at 30" long. This covers most of the case work I do. If I need longer, shorter or intermediate sizes it is really easy to rip another couple of lengths. I finished them with a little left over oil based finish I also had lying around the shop.

In the UK the clamp heads are available from Axminster and cost £8.46 + shipping.