There are no web frames on this simple table. The top fastening rails double up as a drawer anti tilt device. I made the top fastening rails out of some 20mm (3/4") thick stock. There is one counterbored hole in the centre of the span to secure the top to the table. The other outermost holes are slotted to permit the fasteners to move due to seasonal expansion/contraction of the top. Again they are counterbored.
I chose this method of fastening the top to the table rather than using the sliding buttons method that would have required a dado to be cut in each of the aprons. As I am also using the fastening rail to double up as a drawer anti-tilt device it made sense to keep it simple.
 |
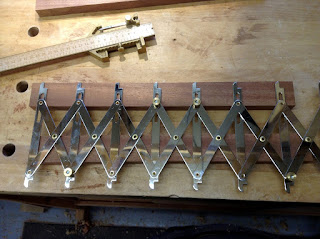
| If you haven't got one of these equi-dividers then I can really recommend them. They take a lot of guess work out of positioning holes. You also don't need a rule to measure them off. |
I marked out the centre of the fastening rail and used my pantographic equi-dividers to mark out the other holes. Then using the drill press the counterbores were machined and the through holes drilled and slotted where necessary.
 |
| The holes were (roughly) counterbored |
Glueing of these parts was simply face to face long grain. No alignment biscuits, dominoes or dowels used - just glue. The parts were left to cure in clamps overnight.
 |
| A few F clamps were used on the glue up. |
 |
| Once the clamps were removed the top surfaces were cleaned up |
 |
| The resulting drawer aperture was ready to make the drawers |

No comments:
Post a Comment