Lining the drawers.
The customer stated that green baize was to be used to line the bottom of the drawers. So I got some self adhesive felt baize that I have used several times before and cut it to size.
Securing the baize is a breeze by peeling back 1" or so of the release paper and gradually working along the drawer rubbing it down as you go along. Final flattening with a veneer roller ensures that any air bubbles are removed.
 |
| Cutting to size |
 |
| Peeling the release paper |
 |
| The finished results are very good. |
Drawer stops
I used a couple of counter sunk wood screws in the back of each drawer to act as stops.
 |
Screw into the end grain of the dovetail
This is repeated on the other side |
 |
| View from inside rear of the table (top off) approaching closure |
 |
| Drawer fully closed |
Drawer pulls
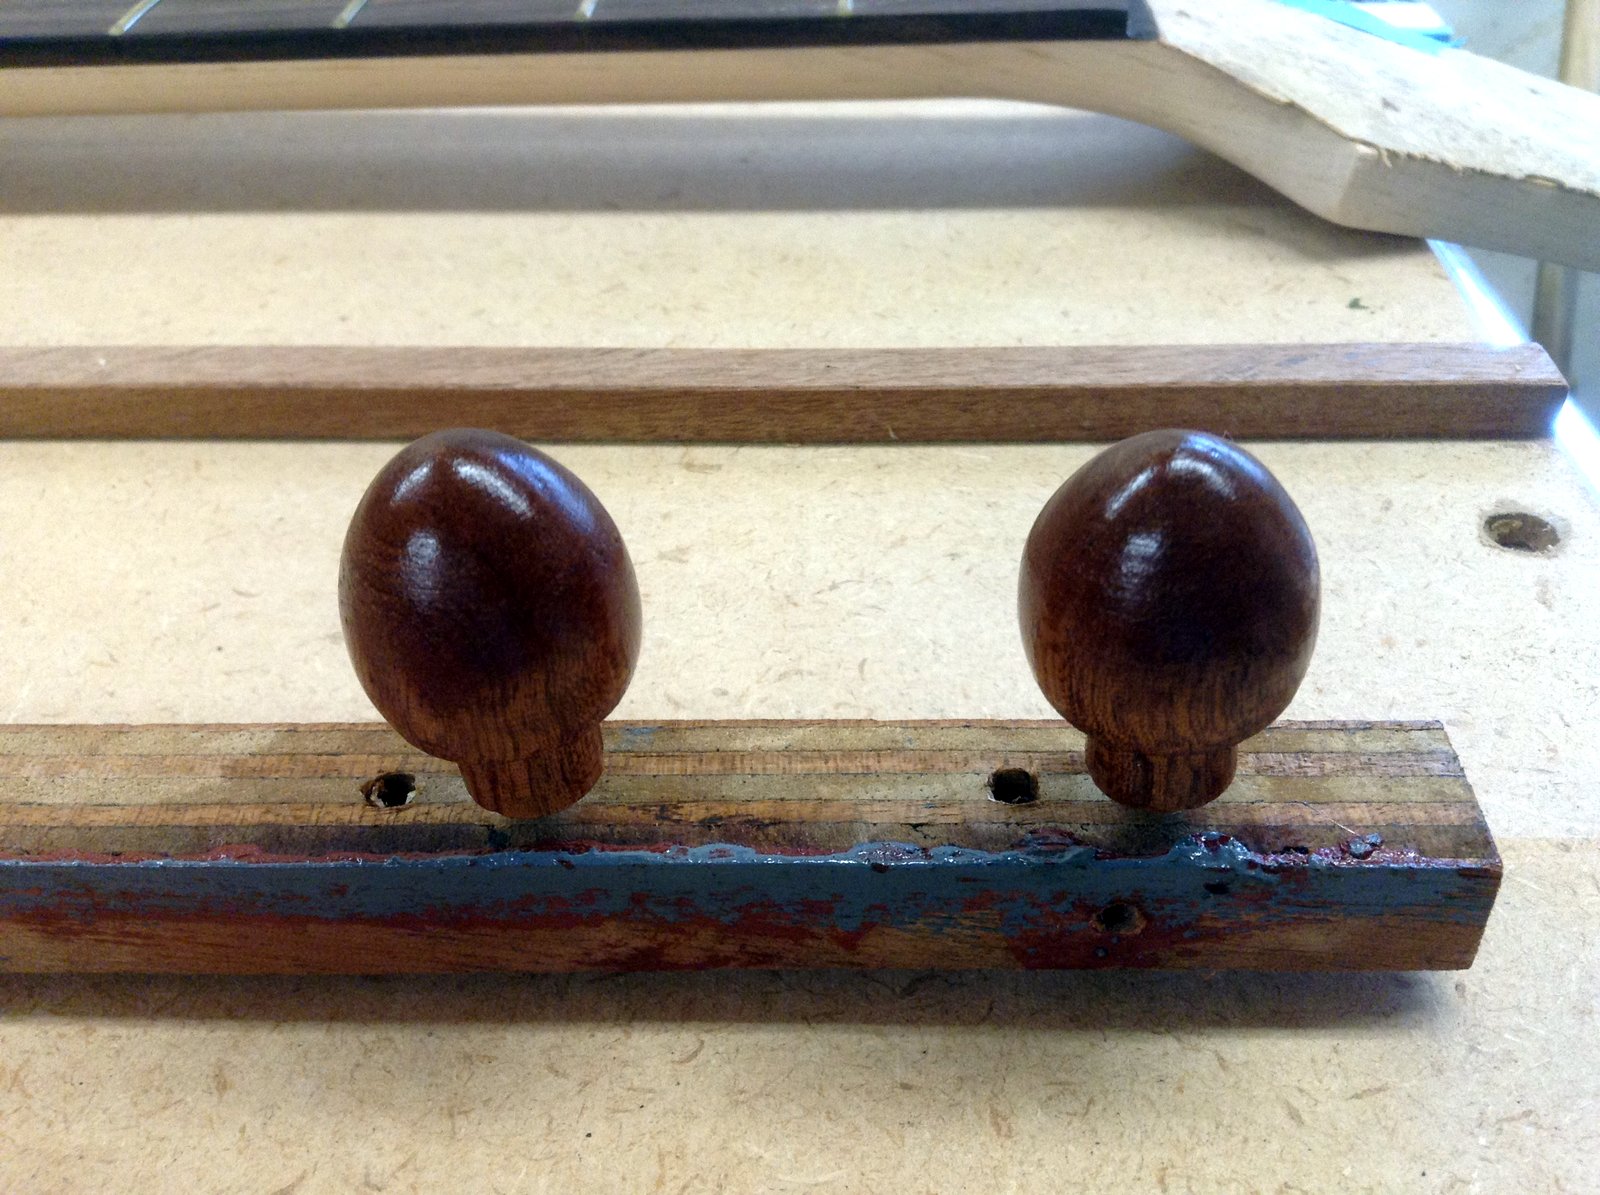
The order from the customer was to have wooden knobs of the same species as the main wood used in the tables. I had all sorts of ideas for fancy drawer pulls made from sapele but "no" came from the client. So who am I to argue.
I broke out the dusty old lathe, sharpened a few gouges, dug out my calipers and turned a couple of knobs. They were finished sanded on the lathe and then when I cut them off at the base were placed into a piece of scrap wood containing a 3/8" hole. This fitted the turned tenon on the knob perfectly. It enabled me to hold the knob to cut the length down to 3/8" long (10mm). A pilot hole was also drilled for a #8 wood screw.
 |
| Finishing the knobs - they are screwed onto a piece of scrap |
Then the knobs were finished with several coats of Arm-R-Seal and left to cure.
Final fitting to the drawers was simply by drilling a pilot hole, blue tape on either side of the hole to prevent break out and screwing the #8 screw from the inside. The knobs were then screwed onto the protruding screw.
The finish of Arm-R-Seal on the entire pieces really brings out the grain of the sapele.


No comments:
Post a Comment