The sealer paint is a red coloured two part epoxy with a hardener added to the main contents making up a total of around 5 litres. I applied it with a roller made for applying epoxy paint.
 |
| DARN!!! |
I left it overnight and the next day it was rock hard. Then I started to apply the top coat which, again, was a two part epoxy. This time the paint is a light grey colour and I started applying it with a brush at the edges and then used a 12" roller for the rest. This time there was more than I needed and I ended up going over sections again to build up a layer. I left it the requisite 12 hours again only to find the next day it hadn't even started to dry.
I think the problem was the temperature of the shop was not 20 Celsius (68 F) as it was the start of winter and the outside temperature was around 7 C (44 F). I used my gas space heater and electric fans to keep the temperature up and within two days it had hardened off sufficiently to walk on. Note to self "make sure you coat the floor when it's warm next time!)
I still have another third to finish but I will wait until the new year when it gets a little warmer before I apply the top coat.
Shop partitioning.
 As part of my design I decided to position my steel shelves in a T shape and put timber sheets on the back of each shelving unit to minimize the amount of dust dropping onto the shelves.
I ended up constructing some mini "rooms" with OSB boarding and then bolted the shelving to the boards. This is great as I now have 3 designated areas within the shop; a lumber store with 3 shelves, a paint store with 2 shelves (this is also to be used as a place to store gardening equipment) and a dedicated area for some of my machine tools (lathe, drill press, jointer and dust/chip extractor).
As you see from my initial SketchUp pictures and comparing them with the actual photographs of the real thing you can see that it certainly works.
 |
| SketchUp Model of the lumber rack and shelving |
 |
| Actual photo of the lumber room |
 |
| SketchUp view of powertool area |
 |
| Actual photo of powertool area |
 |
| Sketchup of the gardening and paint area |
 |
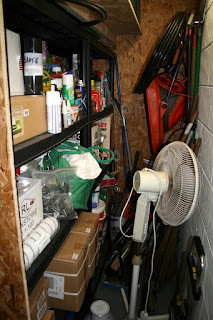
| Actual photo of gardening and paint area - untidy but ordered! |
I also constructed a studding wall faced with OSB on one of the garage door entrances to gain some more wall area. Again this is as per my SketchUp design.
 |
| SketchUp of the studding wall blocking one of the original garage doors |
 |
| Actual photo of the studding wall |
As you can see the use of SketchUp has enabled me to visualize everything (almost) before committing to any building work. The studding wall has also got a lot of insulation to give both sound deadening and the all important thermal insulation. When I put the final board of OSB into place there was a noticeable change in the thermal characteristics of the shop. It felt warmer and no drafts.
The Gorilla Gripper (previously reviewed) came in very useful when moving these sheets of OSB around. I'm glad I bought it.
Other jobs completed.
My brother in law and his family kindly helped move all the rest of the machinery back into the shop. As you may know our Edwardian dining room had become a temporary warehouse for a lot of the contents of the old shop. My wife Elly was really glad when we got that space back and it was then just up to me to reassemble the machinery.
The table saw (a Record Power TS250), the router table, the drill press, the Dewalt band saw and the oscillating spindle sander were reassembled and placed onto their respective mobile bases (also reviewed elsewhere on my blog).
I ended up with machinery in position as designed but fully movable. Check out the pictures below:
 |
| SketchUp of the bench area |
 |
| Actual photo of the bench area |
Now where are my ear defenders???

No comments:
Post a Comment