Monday, 31 August 2015

Bedside tables (nightstands) - Part 10d - Drawers front pin boards

I'm making half blind dovetails on these table drawer fronts - they are also flush mounting drawers. This is still very easy to do but you can only use the saw to cut a 45 degree kerf into the pin board. I had already cut the drawer front Again start by lightly marking a line with your marking gauge on the end grain and on the inside face of the pin board.
Then using a method I have described in another article clamp the pin board vertical in the vise protruding very slightly above the benchtop. Use a square to ensure the adjacent face is square. (I'm showing through dovetails on these next few photos but the principle is exactly the same.)


Mark up the tailboards to ensure you don't get them mixed up. Place one of the tailboards with the chamfered tails inner-most onto the pin board and line up the base of the pins with the edge of the far (the edge furthest from you). Then using the square make sure the tail board is square to the bench apron and level with the edges of the pin board.

Mark around the tails with a 0.5mm mechanical pencil or a knife.

Using a 0.5mm mechanical pencil

Then after removing the pin board from the vise use the marking gauge to make more distinct lines in the waste of the pin board. Some people mark the waste with an X to avoid confusion.

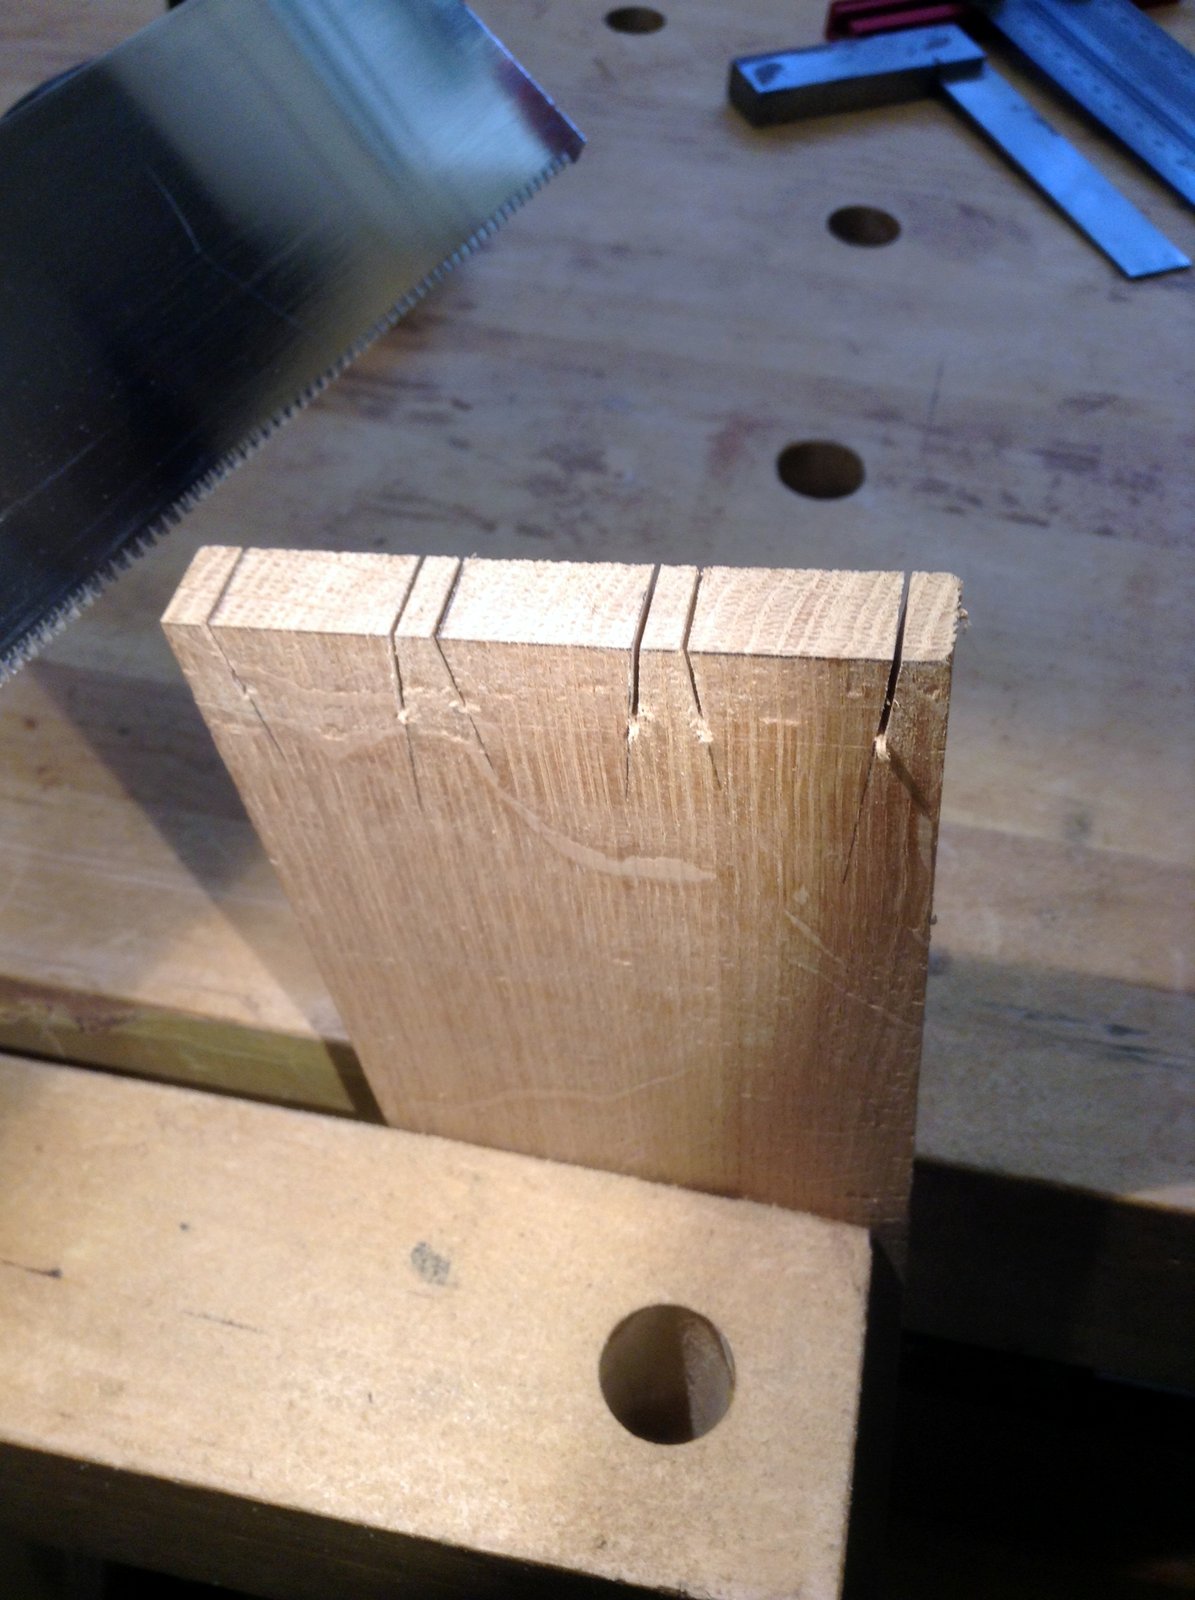
Clamp the pin board in the vise, waste towards you and use your favourite dovetail saw to cut in the waste side. You should start at around 45 degree angle and aim to be as close to the graphite as you can without cutting into it much, keeping the saw plate vertical.


Then you can use the same method of chopping and paring as before to remove the waste. Vertical chop needs to be around 1/16" from the baseline (Franks method) Finally finish off with a shallow vertical chop at the base line. Regular bench chisels work well with this as long as they have bevelled edges. Square edged firmers are not a good idea but bevelled edge firmers are the best (tapered slightly front to back).

Of course you may get the management occasionally inspecting the work.
"What's going on here? You're slacking"

Anna's seal of approval


It is time consuming to do this by hand and you have to make sure you get into the corners of the sockets to remove all waste. The Veritas marking gauge is great to use as a depth gauge to check progress too. It can be used to gauge both the height and depth of the pin.
Veritas gauge used in depth mode to ensure
the pins and to depth

and length

Pin board after clean up


Do a test fit and if you have to remove any stock remove it from the pin board. First undercut the pin slightly and then pare the sides of the socket on the face that is tight. In general if you have been accurate with your sawing and chiselling you should get it to fit first time.


Remember when doing a test fit you need to keep the boards square to each other and you are aiming for a light press fit. If you get a sloppy fit it's not the end of the world as look down at your feet. You see all those bits of end grain shavings? Well you can slide them in the loose fit afterwards and when sanded and finished it'll look just like the surrounding wood (assuming you use the same species!)

Wednesday, 26 August 2015

Bedside tables (nightstands) - Part 10c - Drawers - cleaning tailboards

It's essential that all traces of the waste are removed. This includes anything left in the corner of the tails and any higher bits than the base lines.
I use a couple of skew chisels. You can also use a fishtail chisel (I think Lie Nielsen are the only ones making these at the moment) or some fine bench chisels.

The skews are my favourites  and are made by Kirschen under their Two Cherries brand. They keep and edge really well. When honing or re-establishing the bevel you need to use the Veritas MKII Honing guide with its skew registration jog - both of which I own. It's easy to do with some practice.

Two cherries 1/2" skew chisels

Pare to the centre of the board and make sure
you don't let the non cutting side touch the other
dovetail. Otherwise you will have a chisel shaped ding to fill

Always use you square to make sure that you are level and nothing stick up
beyond the base lines. If it does pare it down again.
If all is well chamfer the inner faces of the tails to ensire that that seat in the dovetail sockets of the pin board. This ONLY applies if you are fitting these tails into a blind socket (making half blind dovetails as I am here). If using through dovetails don't chamfer them as it is not necessary.

Chamfered inner tails - only for half-blind dovetails


Tuesday, 25 August 2015

Bedside tables (nightstands) - Part 10b - Drawers - chopping out tailboards

Then I cut a knife wall at the base line of each scribe mark in the waste. This is to define a clean line that your chisel shouldn't go beyond. As mentioned in the previous post Frank Klausz starts his initial chop about 1/16" away from the base line so that is what I did this time too. I normally work on a sacrificial surface as I like to minimize wear to the bench top as much as I can.

Cutting a knife wall bu undercutting the scribe line
created by the marking gauge

Initial chop about 1/16" from the base line.
This is also repeated on the other side
Excavate at the waste either by simply chopping away or as I do pairing a wedge and then chop away. Do this on both sides so you meet in the middle.

Paring and chopping the waste away
Once the waste is thin enough you can chop it away and it comes out as a lump
A lump of waste being chopped out
Then hold the chisel in the base line scribe and tip it slightly at a couple of degrees off vertical. The chisel handle will be sloping away from the tail board. You can then chop to the middle of the board. Turn it over and repeat and then you will have the base lines of both edges higher than the centre,

Chopping to the centre of the board

Edges.

Removing the waste at the edges is just the same but this time you need to keep the chisel as near to plumb as you can. This will be seen and if you are off by a couple of degrees it will be obvious.

Start again cutting a knife wall with a chisel and then crosscut the waste away getting as close to the baseline as you can (I normally get around 1/32" away)

Cutting a knife wall

Some paring to be done
Now get the chisel as square as you can and simply chop (very lightly) at the waste. I normally use the same width chisel as the stock to do this.
Chopping or paring the edge waste away
while keeping as square as possible
You sometimes find that the saw-cuts are not deep enough so you have to push into the end grain to release the waste.
Paring the waste away down the angle of the dovetail
The finished results can be really good.
A little cleaning up and it will be done


Monday, 24 August 2015

Bedside tables (nightstands) - Part 10a - Drawers - a quick tip beforehand

I'd been watching a few videos showing the master dovetail maker (I know he is really a master craftsman) Frank Klausz and noticed he made dovetails similar to me except he chopped slightly in front of the base line. He removed all the waste by chopping (same as me) and then moved up to the base line and chopped to the centre of the stock on a slight inwards pointing angle (same as me). Then he turned it over to the other side and chopped again to the centre.

I did all this before but didn't chop in front of the base line so gave it a try out on these two drawers. I can report that the results are even better than before. There is very little chance of the wedge action of the chisel pushing the base line away from the line due to the small amount of waste left. I still cut a knife wall on the base line as I always have done before starting the cuts (Frank does this too).

So here are some more boring pictures of dovetailing. I used the tails first method.

I have a few of these spacers of standard thickness 1/2" 5/8" and 3/4" that I
use on my bench vise to stop it crabbing
If you have a crapo vise like mine with a central screw and twin guides you will find that when trying to hold something like a board for cutting dovetail sawcuts it will crab. The vise will stop on your stock but continue on at the other side causing it to tilt and not hold the workpiece properly. Put one of these in the other side and it will tighten properly on the stock - cost zero. Alternatively spend $$$$ on Benchcrafted hardware, a shed load of lumber and make a Roubo :) .
The piece of hardboard or ply nailed to the top of the spacer stops it continually falling on the floor when you open the vise.

A non crabbing vise

After milling all the stock to thickness which in my case was 3/4" for the drawer fronts and 1/2" for the rest of the drawer parts I squared off one end from each of the tail boards. I also cut the drawer fronts so they fit into the drawer aperture with about 1/32" clearance at the top and sides. This clearance is ok in my climate but you may wish to vary according to your own seasonal conditions.

Marking out.

Frank doesn't mark out - I do.
The first thing to do is set your marking gauge at the thickness of the tail boards, lock the gauge and then scribe all around the squared off end of each tail board. At this stage the back end of the tail boards needn't be the correct length nor square. You can adjust that later.

Using the Veritas marking gauge - I prefer this over a traditional gauge

Then mounting the board in the vise (with a spacer at the other end in my case) I used the metric (I know it's the work of the devil :) ) Incra rule to mark off from one end and then turn it over to mark from the other end.

Incra rule

Define the lines with a square and 0.5mm pencil

I then used a Veritas 1:8 saddle gauge to guide me when marking off the slope of the saw lines. Again Frank doesn't even use a pencil to mark his line he just saws away - he's been doing it a lot longer than me.


Veritas 1:8 hardwood marking saddle. You don't really need one of these
as I got away with a sliding bevel for years but they are great.

Position it so you can see the pencil mark

Mark sure you mark both sides if you are not practiced at
keeping the saw square. You can then do a little at a time
while peering over the other side from time to time

Sawing wood 

Then using a dovetail saw I cut close to the base line at all marks. I use beeswax on the teeth and plate for lubrication.
I use a japanese pull saw and have been known to use
one with a back sometimes too!

Take you time to keep the saw square to the cut and
follow the line. You are aiming to keep the
graphite on the keeper

Try to get as close to the baseline as you can
without going beyond it.